JavaScript dialog boxes provide an easy way to receive inputs from visitors and output results for them to see. We can use these functions to make all sorts of things!!
Before we begin…
I highly recommend following along in this article! It’ll help you understand and remember the concepts better. To get started, create this HTML file and then open it up in your browser:
<html>
    <head>
        <title>JavaScript Dialogs</title>
    </head>
    <body>
        <script>
            // Exciting code coming soon!
        </script>
    </body>
</html>
If you want to try out some JavaScript, you can put it in the<script>tag, save, reload the page and see what happens!You’re all set up now! Enjoy…
Alert
Let’s say we want our JavaScript to output something. We have a few options…
1. console.log it
This method is great for testing our program, but it’s not a good way to output something in the final product. This is because no-one can see what you’re outputting unless they open up the console!
2. Put the result into our HTML
Using the JavaScript DOM, we can put the result in our HTML. This is good because it displays the result to a visitor without them having to open the console. Note that alerts are much easier than this method — if you’re in the very early stages of learning JavaScript, maybe stick to alerts for now.
3. Use alert!
Alerts are little boxes that pop up over a web page with some text. Here’s what it looks like in Google Chrome:
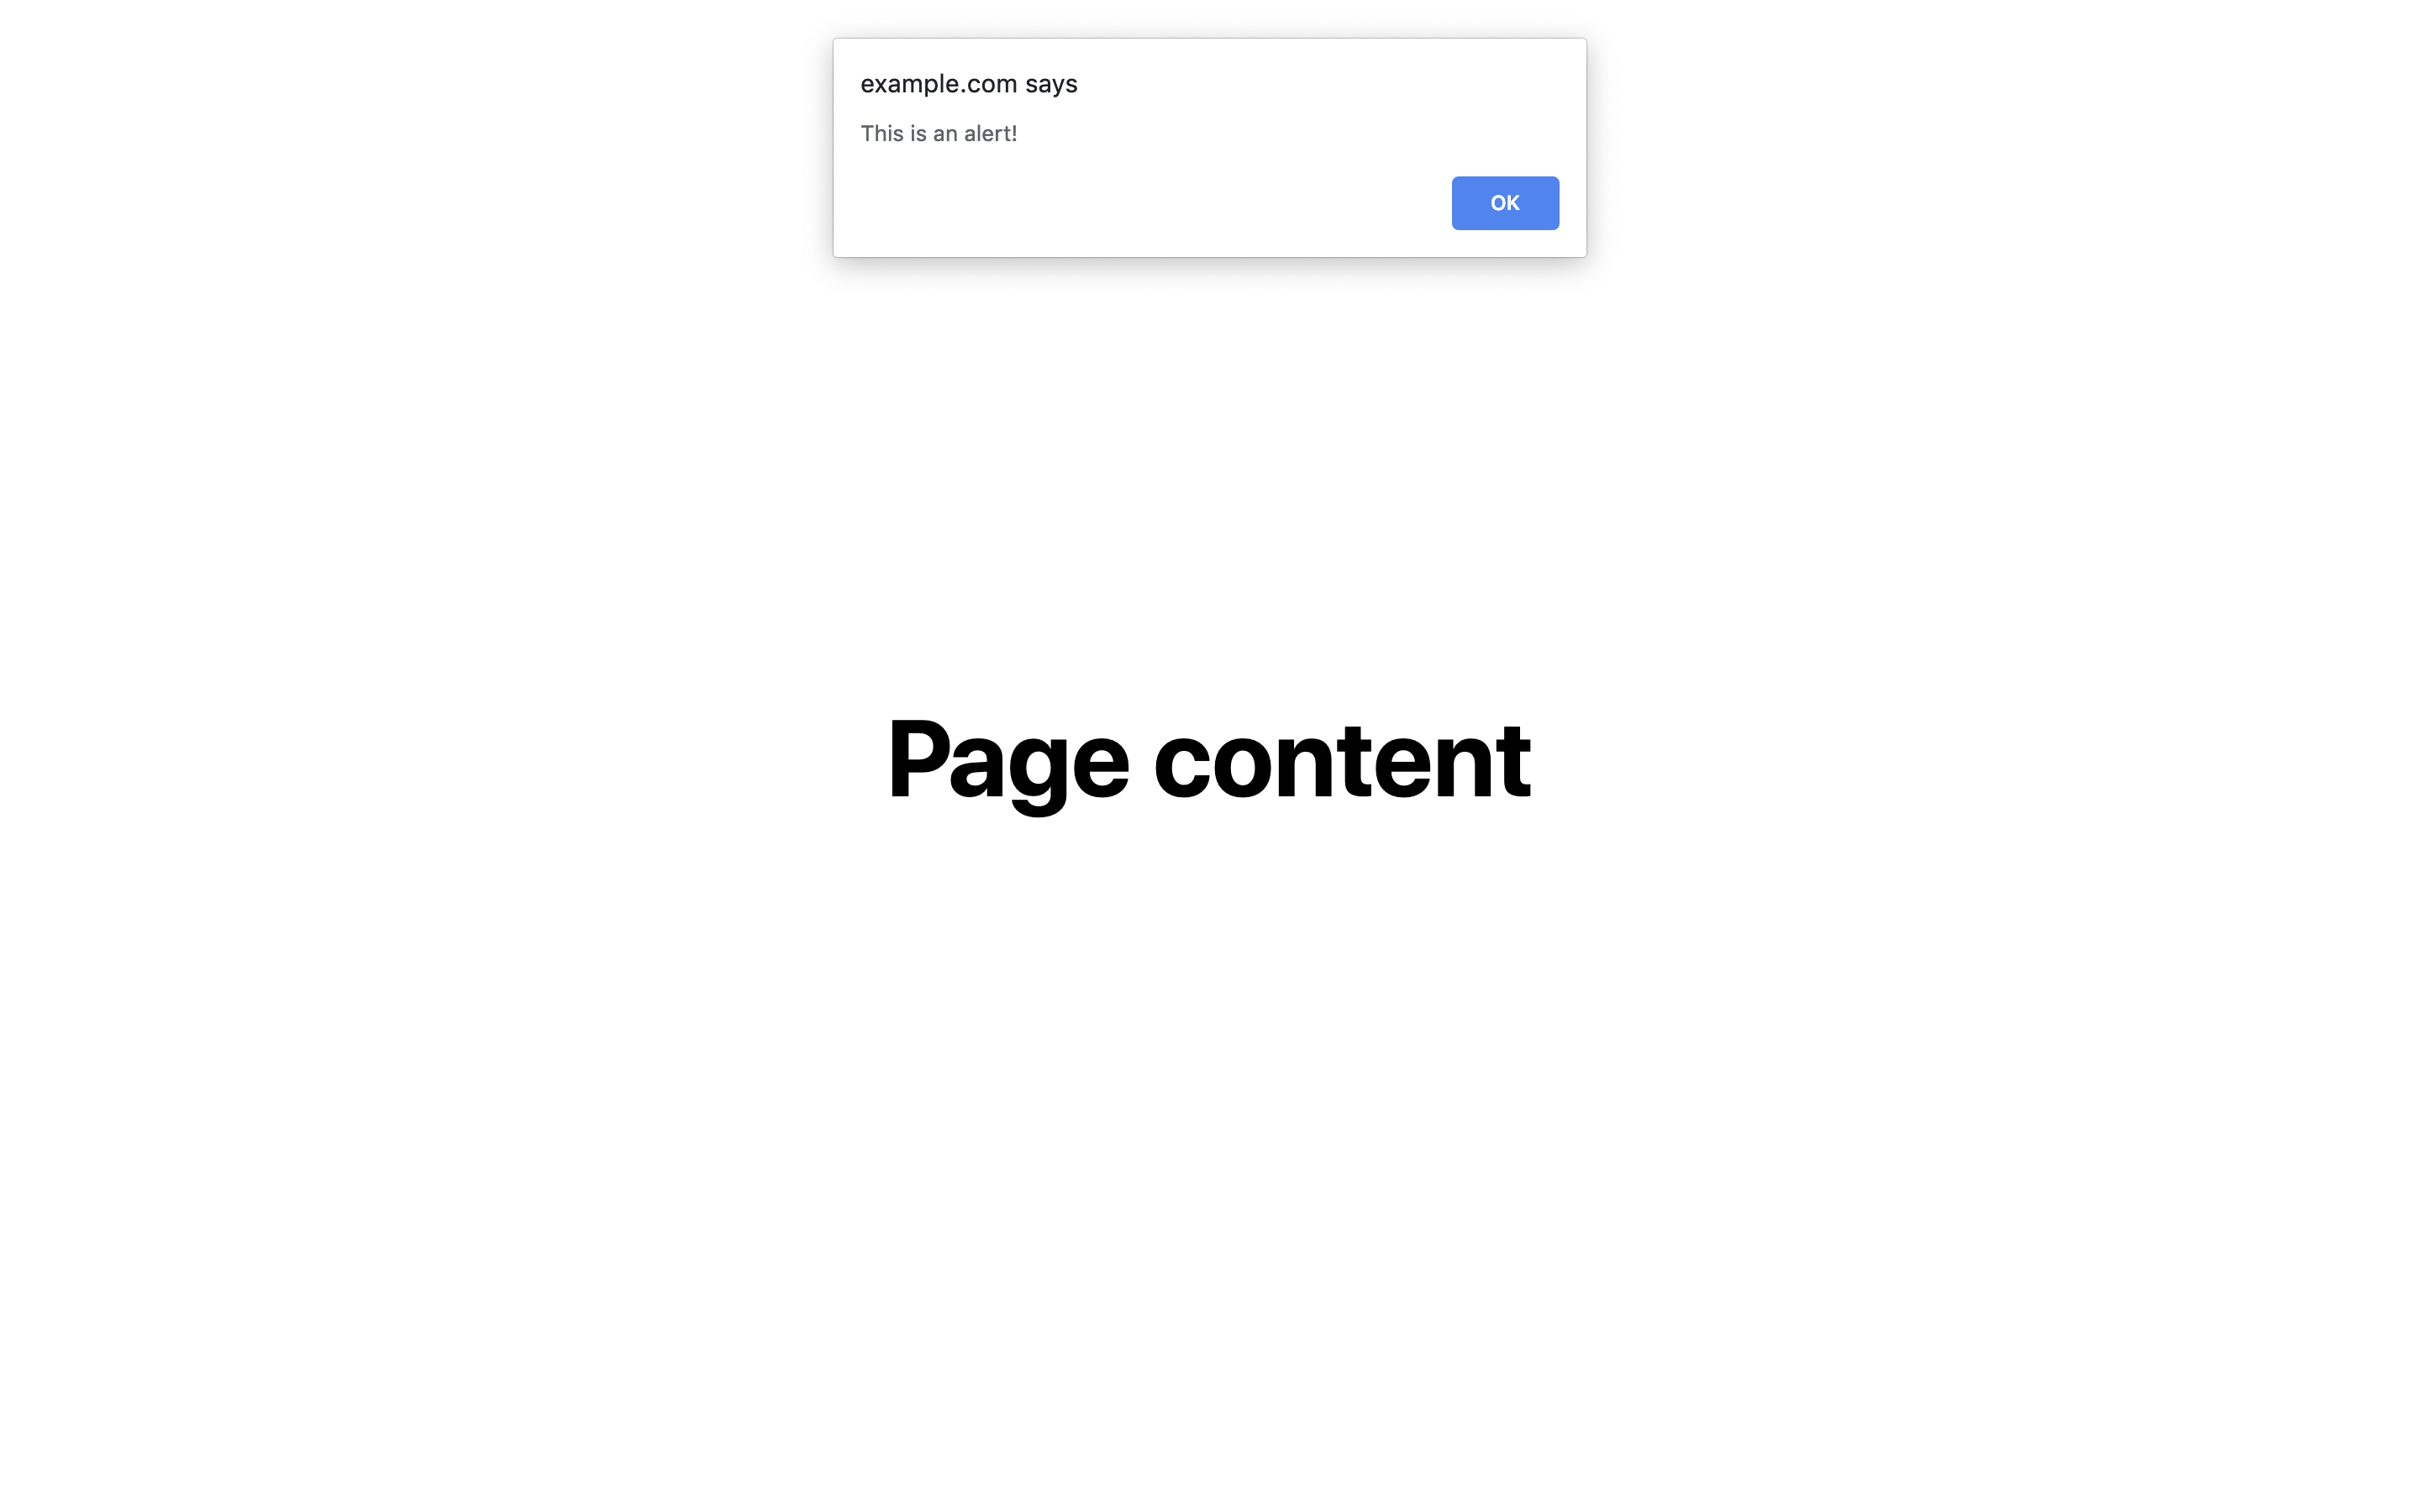
Cool, right? Now the visitors have a little box that pops up saying whatever we tell it to say in our JavaScript!! 😁
Try it out yourself! It’s pretty simple — you can just put it in your code like this:
alert('Your text here!');
Confirm
JavaScript confirm dialogs are exciting because they’re the easiest way to get a visitor to — well — confirm something! It’s the simplest form of user input in JavaScript. Here’s what it looks like:

Here’s how we create the example above:
confirm('Do you want to press the big blue button?');
Instead of just having an OK button to close it like alert, it has two buttons — OK and Cancel. We can then actually see the result of which button they clicked in our JavaScript! We can just set a variable to the confirm function above, and it will end up being true or false depending on which button the visitor clicks. Here’s an example:
var result = confirm('Your text here?');
The variable result will then be set to true if you clicked OK or false if you clicked Cancel.
Let’s do a quick challenge using the concepts you’ve learned so far! Try writing some JavaScript that creates a confirm dialog. If the visitor clicks OK, open up a dialog box saying You clicked OK!. If they clicked cancel, open up a dialog saying You clicked Cancel!. See if you can work it out…
var result = confirm('Press one of the buttons...');

if(result === true) {
    alert('You clicked OK!');
} else {
    alert('You clicked Cancel!');
}
Prompt
Prompts also let us get input from the visitor using a dialog box. But instead of giving them two options (OK/true and Cancel/false), we give them infinite! Because in a prompt box, they can type whatever they like. The code is this simple!
var text = prompt('Type some text:');
Here’s what it looks like:
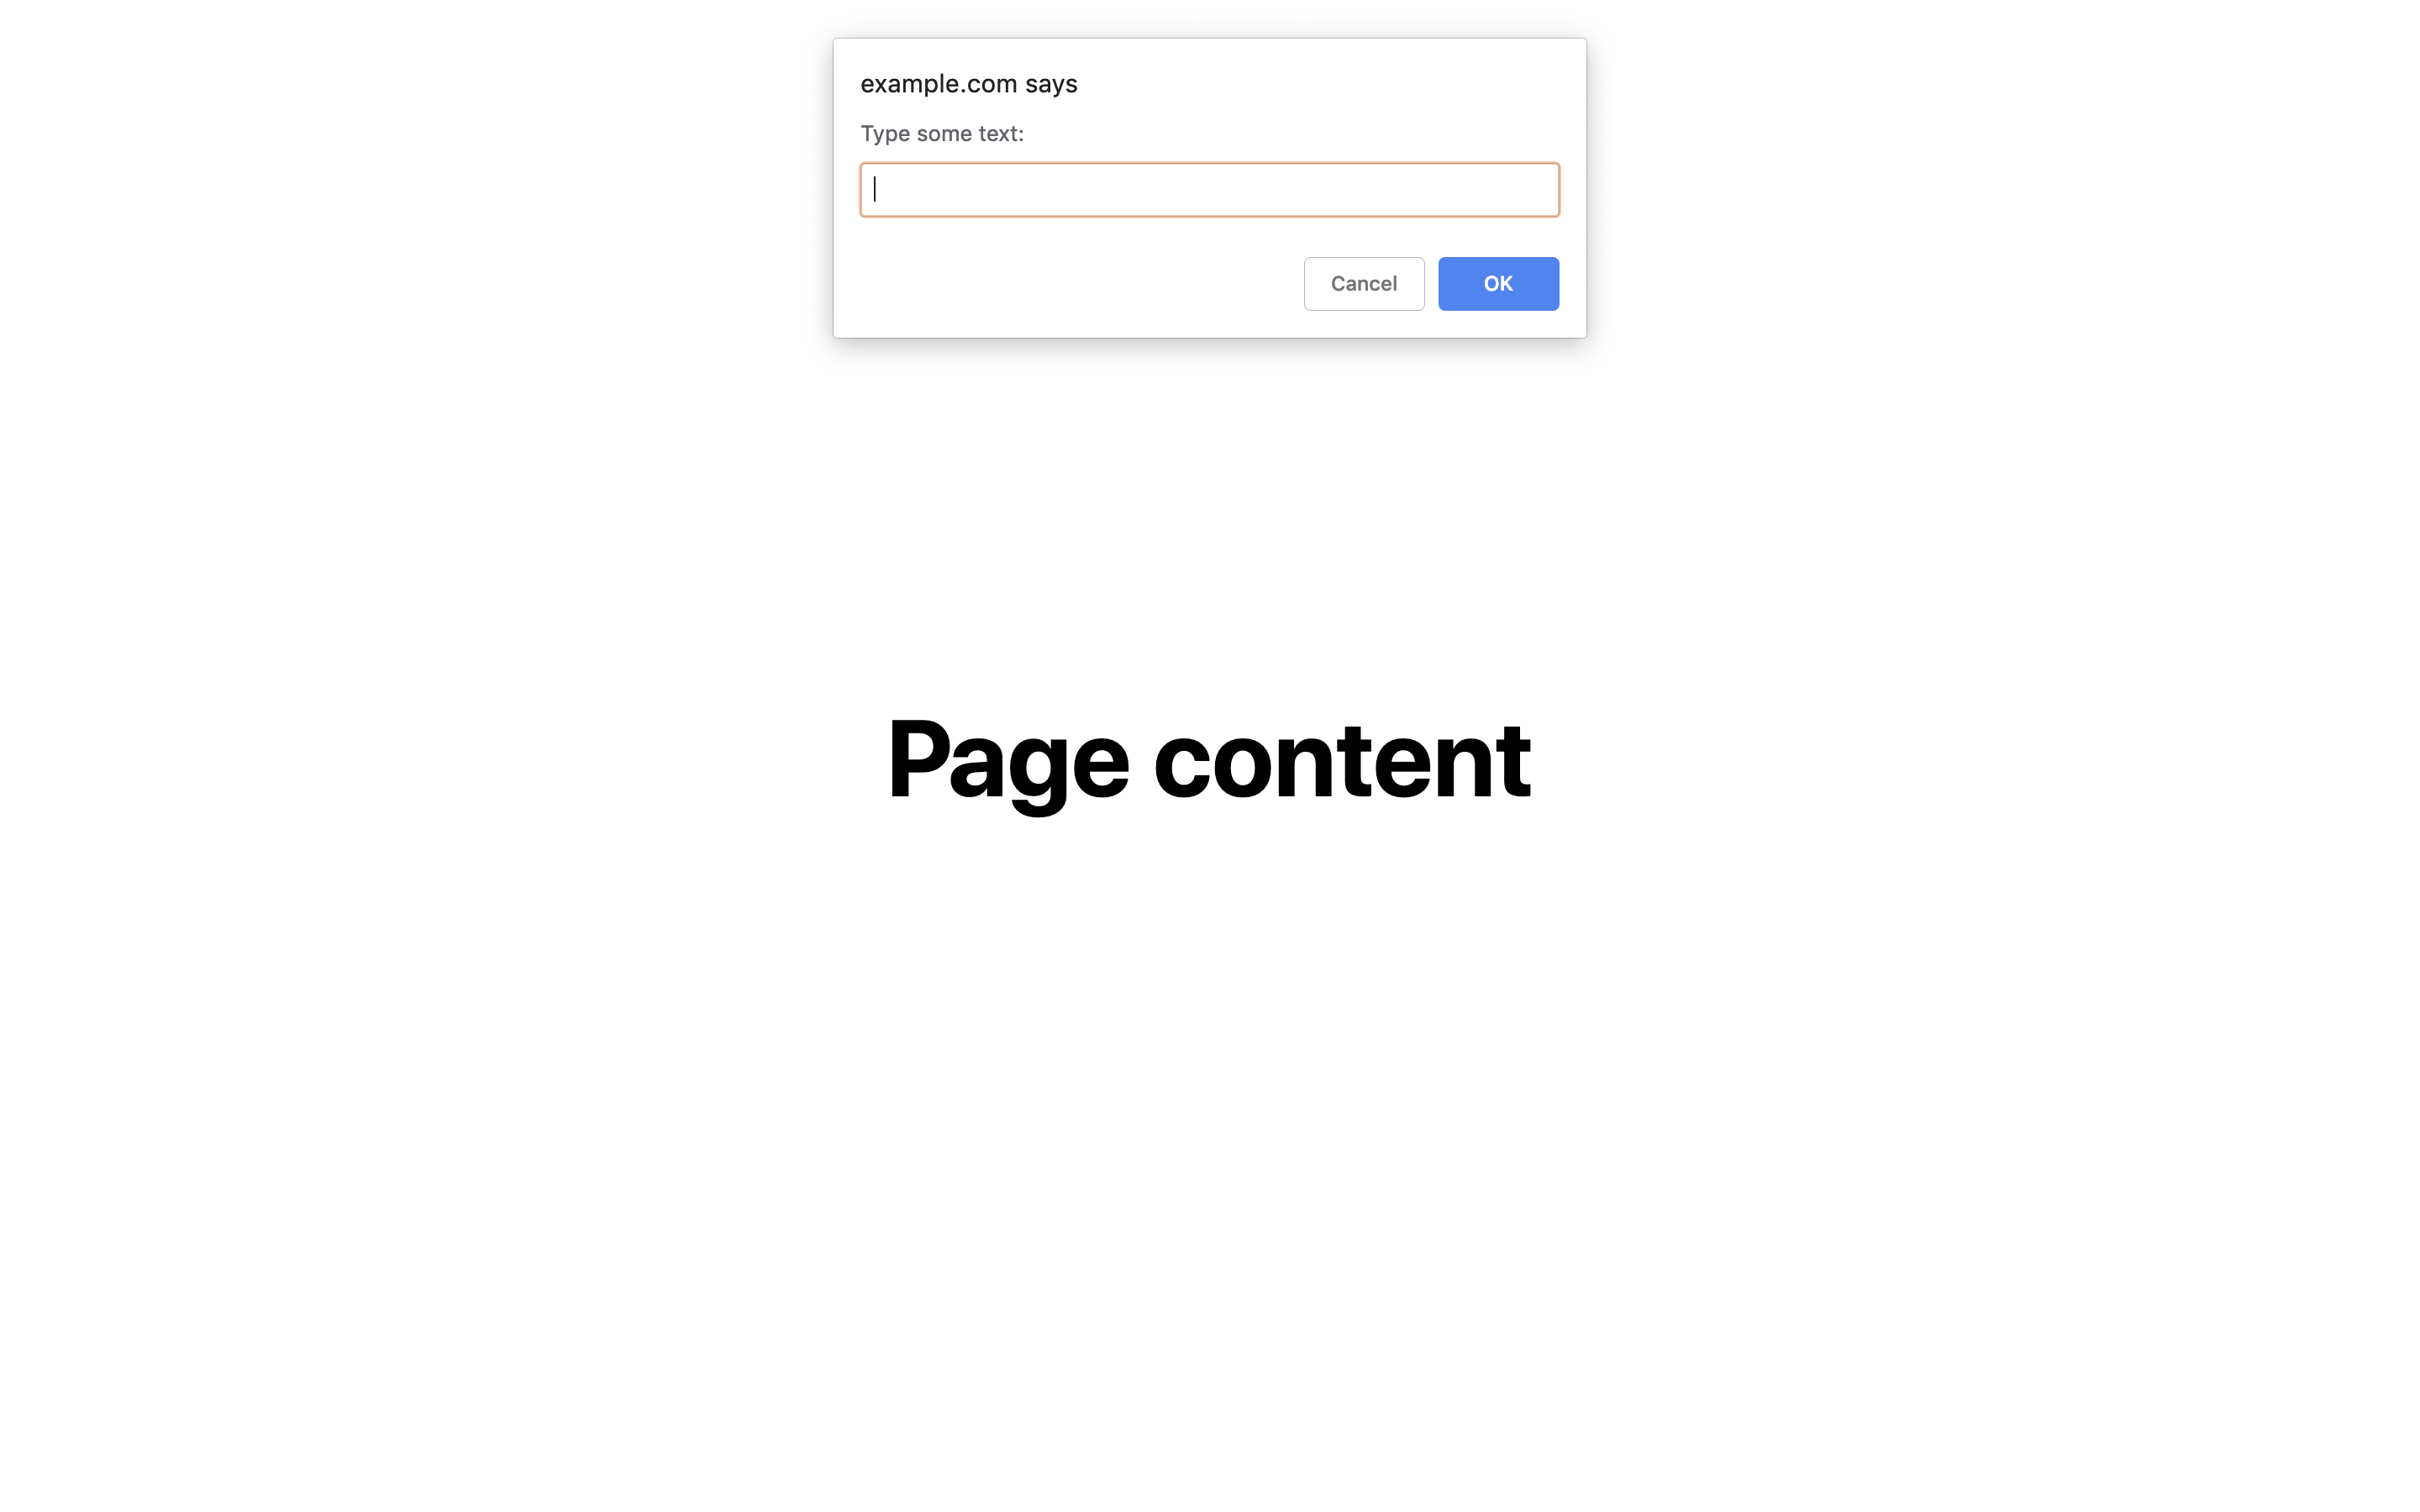
Once the user types some text and hits OK (or the Enter key), we can see what they typed! All we need to do is use the variable that we set to the prompt:
var text = prompt('Type some text:');
alert(text);
It will now alert whatever you typed!
But see that Cancel button in the image above? What happens if we click that? Then our variable text will just be set to null, which basically means “nothing”. Using this information, try and make some code which will alert what we typed if we hit OK and alert You hit Cancel! if we hit Cancel…
var text = prompt('Type some text:');
if(text === null) {
    alert('You hit Cancel!');
} else {
    alert(text);
}
Conclusion
Awesome! That’s all for today! While these concepts might seem simple (or they might not 😉), we’ve actually learned some really important stuff. We’ve learned how to get an input from the user, and then output something back to them! This is one of the most important parts of programming.
If you want some extension, you can use these functions to make whatever you want! Here are a few ideas…
- A number guessing game — the program chooses a random number and lets you guess numbers until you get it right. After each number, it tells you if you’re over or under!
- A basic calculator — you can input as many numbers as you like until you hit Cancel. Then the program will alert the sum of those numbers. If you’re feeling especially adventurous, you could find a way to incorporate other maths functions too.
You’ll probably need to do a bit of searching on the internet to make some of these. And that’s perfectly okay! Even very experienced programmers look things up all the time — it helps them become better programmers.
If you found this article helpful, go ahead and share it — someone else might find it helpful too 😉
If you have any feedback, need help or just wanna say hi, feel free to do so in the comments, or via the live chat widget in the corner.
If you found this article helpful, I’d really appreciate it if you bought me a coffee — it takes lots of time and effort to write these articles and maintain this site, and you get to read it all for free!
And finally, don’t forget to join the newsletter to receive great quality curated web development tutorials once a week from Code The Web and around the internet.
See you next time!! 😀