There are many situations in web development where you really need to parse (interpret) a URL. Learn how to do that with URL objects in this article!
Getting started
Create an HTML file with the following code, then open it up in your browser:
<html>
    <head>
        <title>JavaScript URL parsing</title>
    </head>
    <body>
        <script>
            // Exciting code coming soon!
        </script>
    </body>
</html>
If you want to try out anything in this article, you can put it in the <script> tag, save, reload the page and see what happens! In this tutorial, I’ll be using console.log — this prints stuff to the console so you can see it. To open up the console:
- Right-click
- Go to ‘Inspect Element’
- Go to the ‘Console’ tab
That’s all! I hope you enjoy…
What is a URL?
This should be fairly straightforward, but let’s just make it clear. A URL is the address of a web page, the unique thing that you can type into your browser to get to it. You can find it in the address bar:
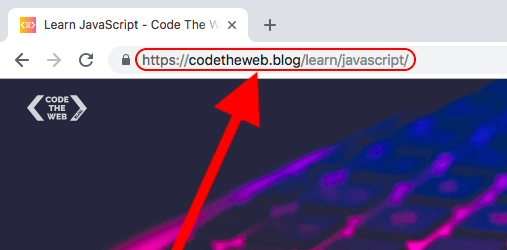
It stands for Uniform Resource Locator — basically a fancy way of saying that a URL is a standard way to find a specific page (resource) on the internet.
Also, if you’re not familiar with how basic URL paths work, you might want to skim over this article.
URLs don’t all look the same
Here’s a quick reminder — URLs can be really weird sometimes! You can have URLs such as:
https://example.com:1234/page/?a=b
http://localhost/page.html
https://154.23.54.156/page?x=y#bottom
file:///Users/username/folder/file.png
Getting the current URL
Getting the URL of the current page is super easy — we can just use window.location!
Try it out by adding this to your script:
console.log(window.location);
Reload the page and see what happens…

Not what you were expecting? This is because it’s not returning the actual URL text that you see in your browser — it’s returning a URL object. With this URL object, we can interpret different parts of the URL! We’ll get to that very soon.
Creating a URL object from a string
As you’ll soon see, you can use a URL object to understand the different parts of a URL. What if you want to do this with any URL, instead of just the URL of the current page? We can do this by creating a new URL object. Here’s how to create one:
var myURL = new URL('https://example.com');
It’s that easy! You can see for yourself by adding the line above and then logging it to the console:
console.log(myURL);

For the purposes of this article, let’s set myURL to this value…
var myURL = new URL('https://example.com:4000/folder/page.html?x=y&a=b#section-2')
Copy and paste that into your <script> element so you can follow along! There might be some parts of this URL that you aren’t familiar with because they’re not always used — but you’ll learn about them below, so don’t worry!
The anatomy of a URL object
With a URL object, it’s super easy to get different parts of the URL. Below are all the things that you can get from a URL object. For these examples, we’ll be using myURL that we set above. Let’s jump right it!
href
The href of a URL is basically the entire URL as a string (text). So if you wanted to get the page’s URL as a string instead of a URL object, you could write window.location.href.
Let’s try logging myURL as a string!
console.log(myURL.href);
// Output: "https://example.com:4000/folder/page.html?x=y&a=b#section-2"
protocol
The protocol of a URL is the part at the start. This is telling the browser how to access the page, for example over HTTP or HTTPS. But there are lots of other protocols as well such as ftp (File Transfer Protocol) and ws (WebSocket). Generally, websites will use either HTTP or HTTPS. Although if you’ve got your file open from your computer, you’re probably using the file protocol! The protocol part of a URL object includes the :, but not the //. Let’s try it out on myURL!
console.log(myURL.protocol);
// Output: "https:"
hostname
The hostname is the domain name of the site. If you’re not familiar with a domain name, it’s the main part of the URL that you see in the browser — for example, google.com or codetheweb.blog. Try logging the hostname of our example URL…
console.log(myURL.hostname);
// Output: "example.com"
port
The port number of a URL comes after the domain name, separated by a colon (eg. example.com:1234). Most URLs don’t have a port number, it’s quite rare. A port number is the specific ‘channel’ on the server to get the data from — so if I owned example.com, I could send different data on multiple different ports. But usually the domain name just defaults to one specific port, so no port number is needed. Let’s see the port number of myURL …
console.log(myURL.port);
// Output: "4000"
host
The host is simply the hostname and the port put together! Try getting the host of myURL:
console.log(myURL.host);
// Output: "example.com:4000"
origin
The origin combines the protocol, hostname, and port of a URL together. It’s basically the whole URL until the end of the port number, or until the end of the hostname if there’s no port number. Let’s try it out!
console.log(myURL.origin);
// Output: "https://example.com:4000"
pathname
The pathname is the part that comes after the origin of the URL, the bit with all the slashes. It goes all the way up to the part after the final slash but doesn’t include hashes (#whatever) or query strings (?a=b). It’s basically the path to get to that particular page from the main domain name! Here’s our path for myURL…
console.log(myURL.pathname);
// Output: "/folder/page.html"
hash
Hashes can be added to a URL to scroll directly to an element with an ID. For example, if you had an element with an ID of hello, you could add #hello to the URL to scroll directly to it. Try adding #protocol to the URL of this page to scroll directly to the section before about the protocol! This works because the heading has an ID of protocol. We can get the hash in a URL like this:
console.log(myURL.hash);
// Output: "#section-2"
search
You can also add query parameters to a URL. They are key-value pairs, meaning that you’re setting particular ‘variables’ to particular values. Query parameters have the form of key=value. They are separated by & symbols, although the first pair has ? at the front instead. Here’s an example of some URL query parameters:
?key1=value1&key2=value2&key3=value3
Note that if the URL also has a hash, the query parameters come before the hash, like in our example URL:
https://example.com:4000/folder/page.html?x=y&a=b#section-2
To get the query parameters as a string, we simply use myURL.search:
console.log(myURL.search);
// Output: "?x=y&a=b"
However, if we want to split them up and make sense of them it’s a little bit more complicated.
Parsing query parameters with URLSearchParams
To parse (make sense of) query parameters, we need to create a URL Search Parameters object, like so:
var searchParams = new URLSearchParams(myURL.search);
We can then get the values of specific keys by calling searchParams.get('key'). Let’s use our example URL — here were the original search parameters:
?x=y&a=b
So if we call searchParams.get('x') then it should return y, and searchParams.get('a') should return b. Let’s try it out!
console.log(searchParams.get('x'));
// Output: "y"
console.log(searchParams.get('a'));
// Output: "b"
Conclusion
Okay, that’s it! Now you can break down and understand URLs with JavaScript like a pro 😎
If you found this article helpful, share it! Someone else might find it helpful too 😄
If you have any feedback, need help or just wanna say hi, feel free to do so down in the comments, or via the live chat widget in the corner.
If you found this article valuable, I’d really appreciate it if you bought me a coffee — it takes lots of time and effort to write these articles and maintain this site, and you get to read it all for free!
And finally, don’t forget to join the newsletter to receive great quality web development tutorials once a week from this site and around the internet (curated by me).
See you next time, where I’ll be talking about dates and time in JavaScript!