Normally, when you set a variable, it goes away once you reload the page. What if you could store data that stays every time you load the page? That’s what localStorage is! Learn how to use it in this article.
Before we begin…
I highly recommend following along in this article! It’ll help you understand and remember the concepts better. To get started, create this HTML file and then open it up in your browser:
<html>
    <head>
        <title>JavaScript LocalStorage</title>
    </head>
    <body>
        <script>
            // Exciting code coming soon!
        </script>
    </body>
</html>
If you want to try out some JavaScript, you can put it in the
<script>tag, save, reload the page and see what happens!You’re all set up now! Enjoy…
What is localStorage and how does it work?
LocalStorage is a way of storing data permanently in the browser. Unlike setting a normal variable, it does not reset when you reload the page, and you can access the same localStorage data from any page on your website.
LocalStorage is a key-value store, meaning that you store data with a key. A key is a ‘label’ for the data that you can use to retrieve it, kind of like a variable name. For example, you could save the user’s high score in a game using a key of highScore.
All localStorage data gets converted to a string before saving, even if it’s not a string to begin with.
Inspecting localStorage
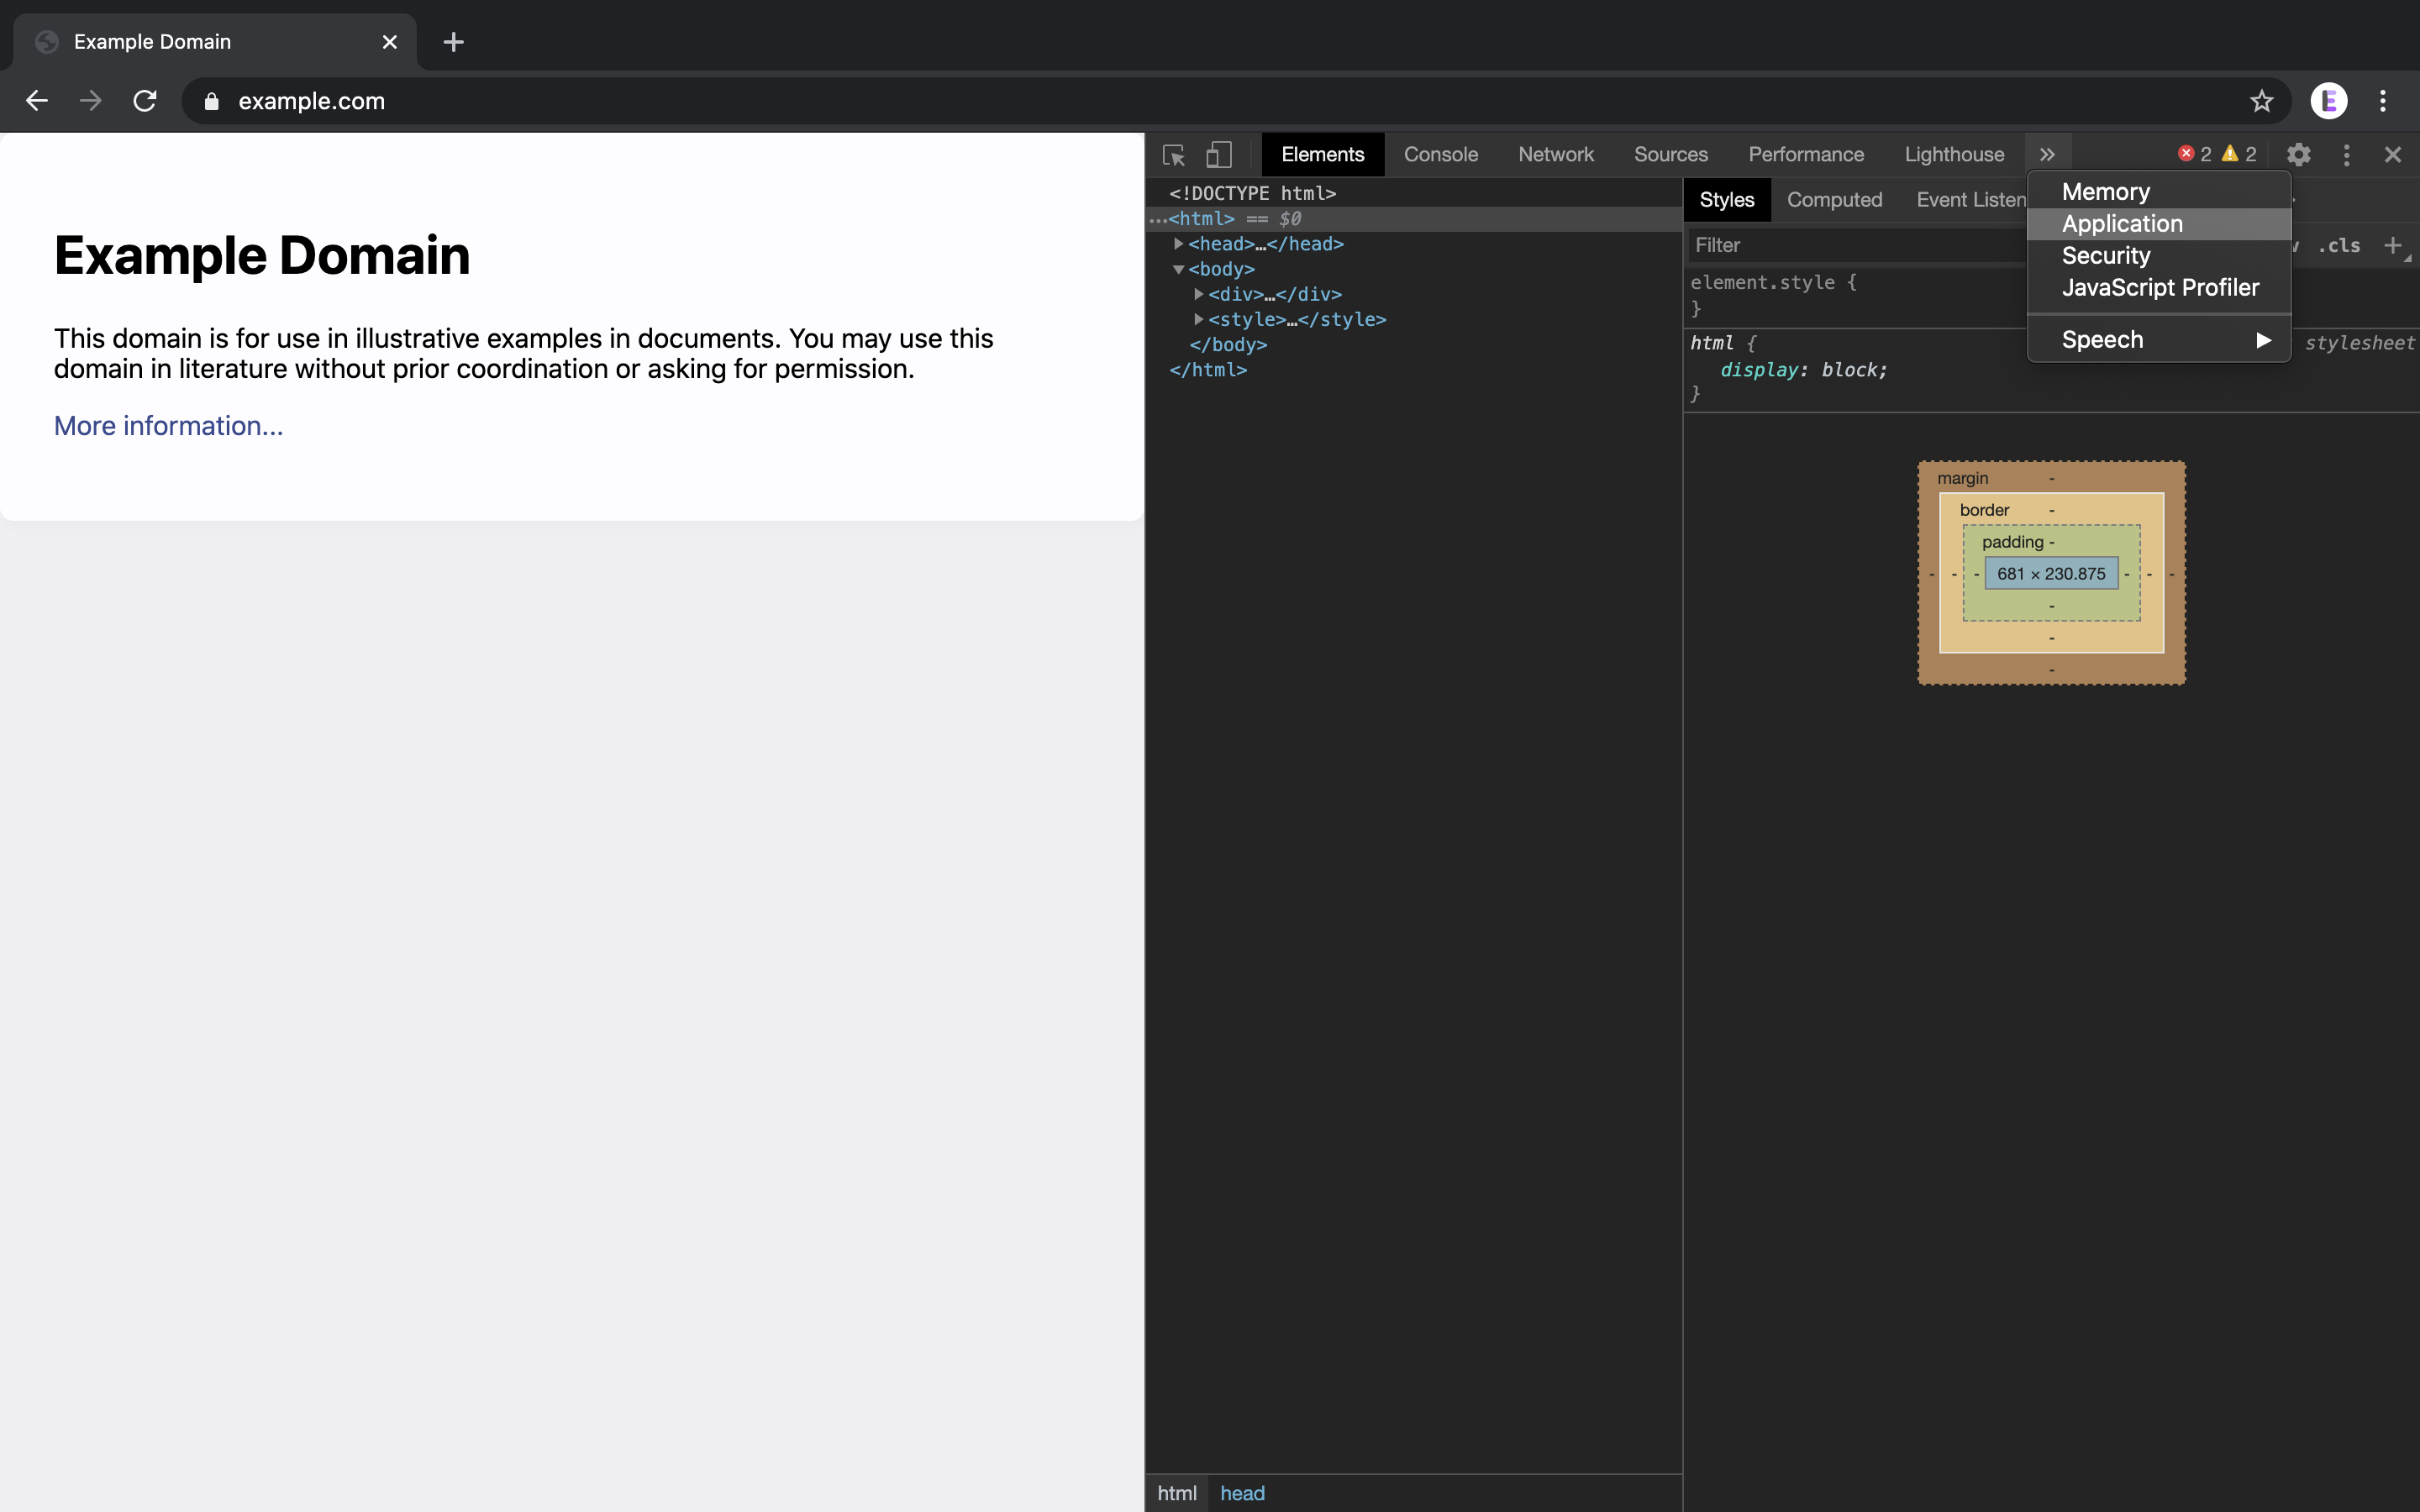
Google Chrome has a built-in tool to help you view the data that you have stored in localStorage. Many other browsers also have similar tools. To open the localStorage inspector in Google Chrome, start by right-clicking on your page, then clicking “Inspect Element”. From here, go to the “Application” tab. You may need to click the little arrow in the inspector tab bar to find it:
In the Application tab, expand the “Local Storage” section in the sidebar, and click on the option that comes up underneath it:
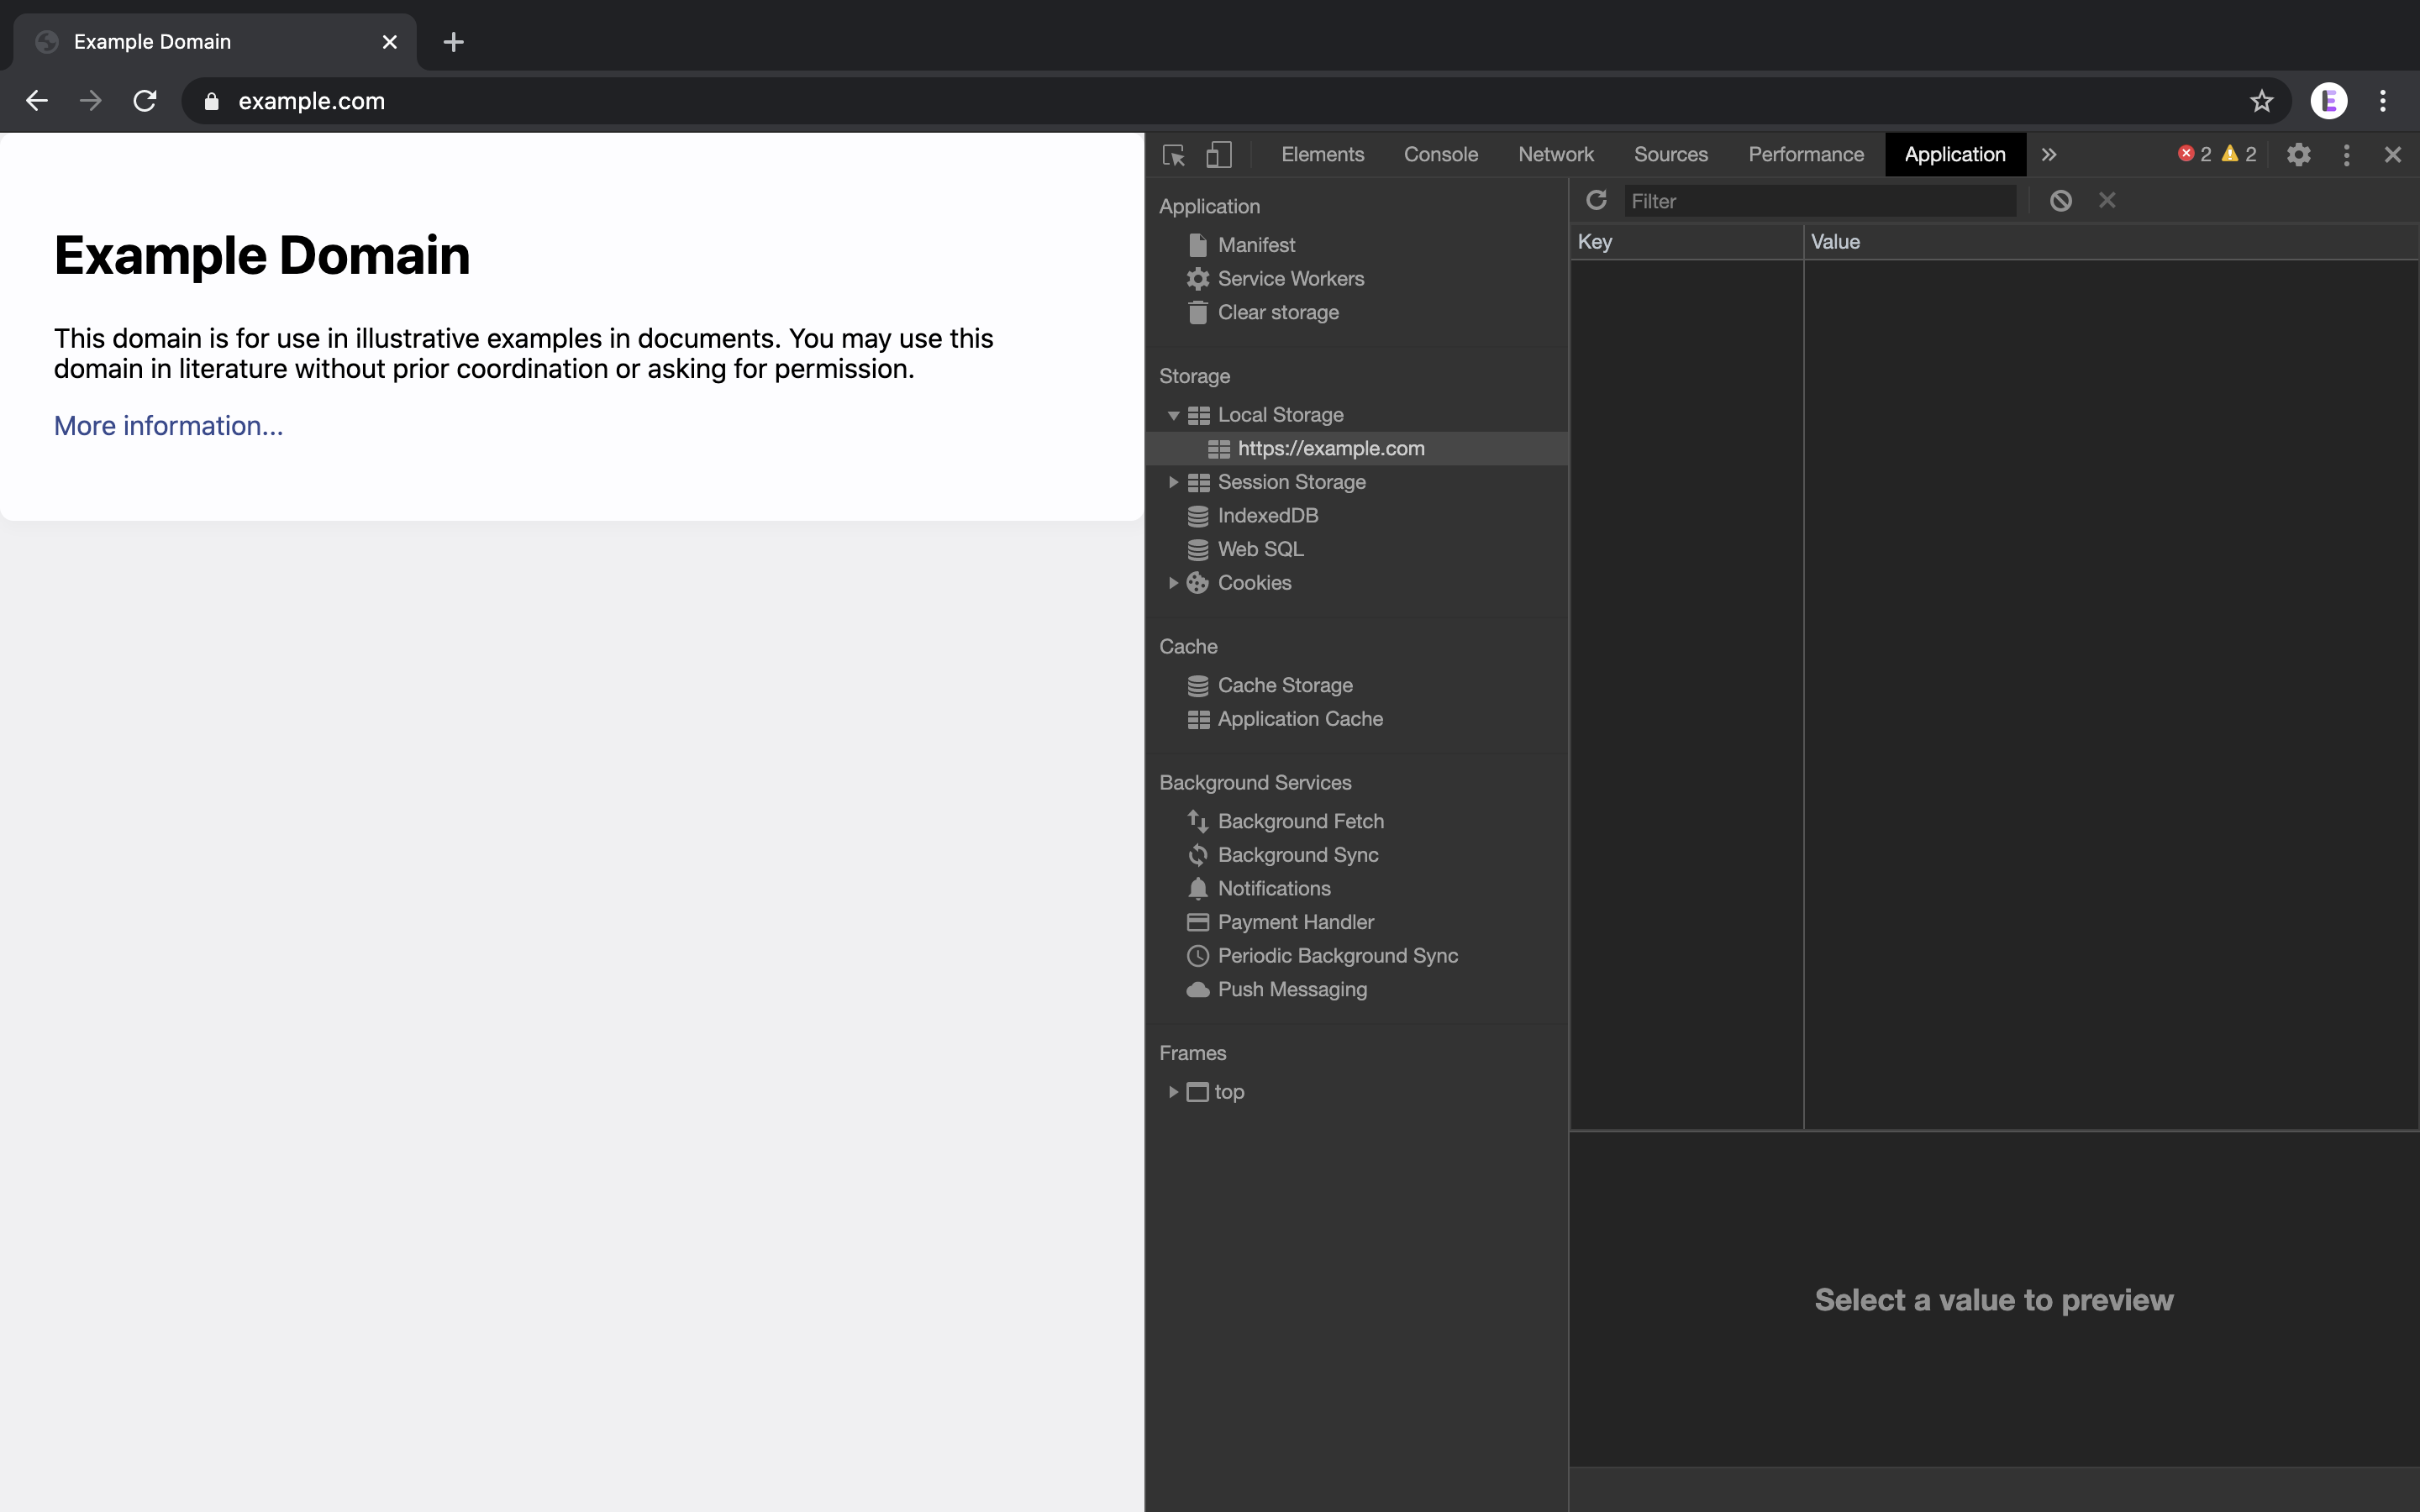
Great! This is where our data will show up once we start setting stuff in localStorage.
Note that if you’re using an HTML file that you’ve opened up in your browser, you may already see some data in there. This is because all page URLs starting with file:// use the same localStorage area. Normally, each domain name has its own localStorage area. So example.com, google.com and blog.example.com would all have different localStorage areas. Setting an item in localStorage for one of them would not set it for the others.
Adding and updating data with localStorage.setItem
Let’s get started by adding some data to localStorage!
We can use the localStorage.setItem function to do this. It takes two parameters — the key to store the data under, and the value that you want to store. For example, this code sets the key fullName to Jenny Smith in localStorage:
localStorage.setItem('fullName', 'Jenny Smith');
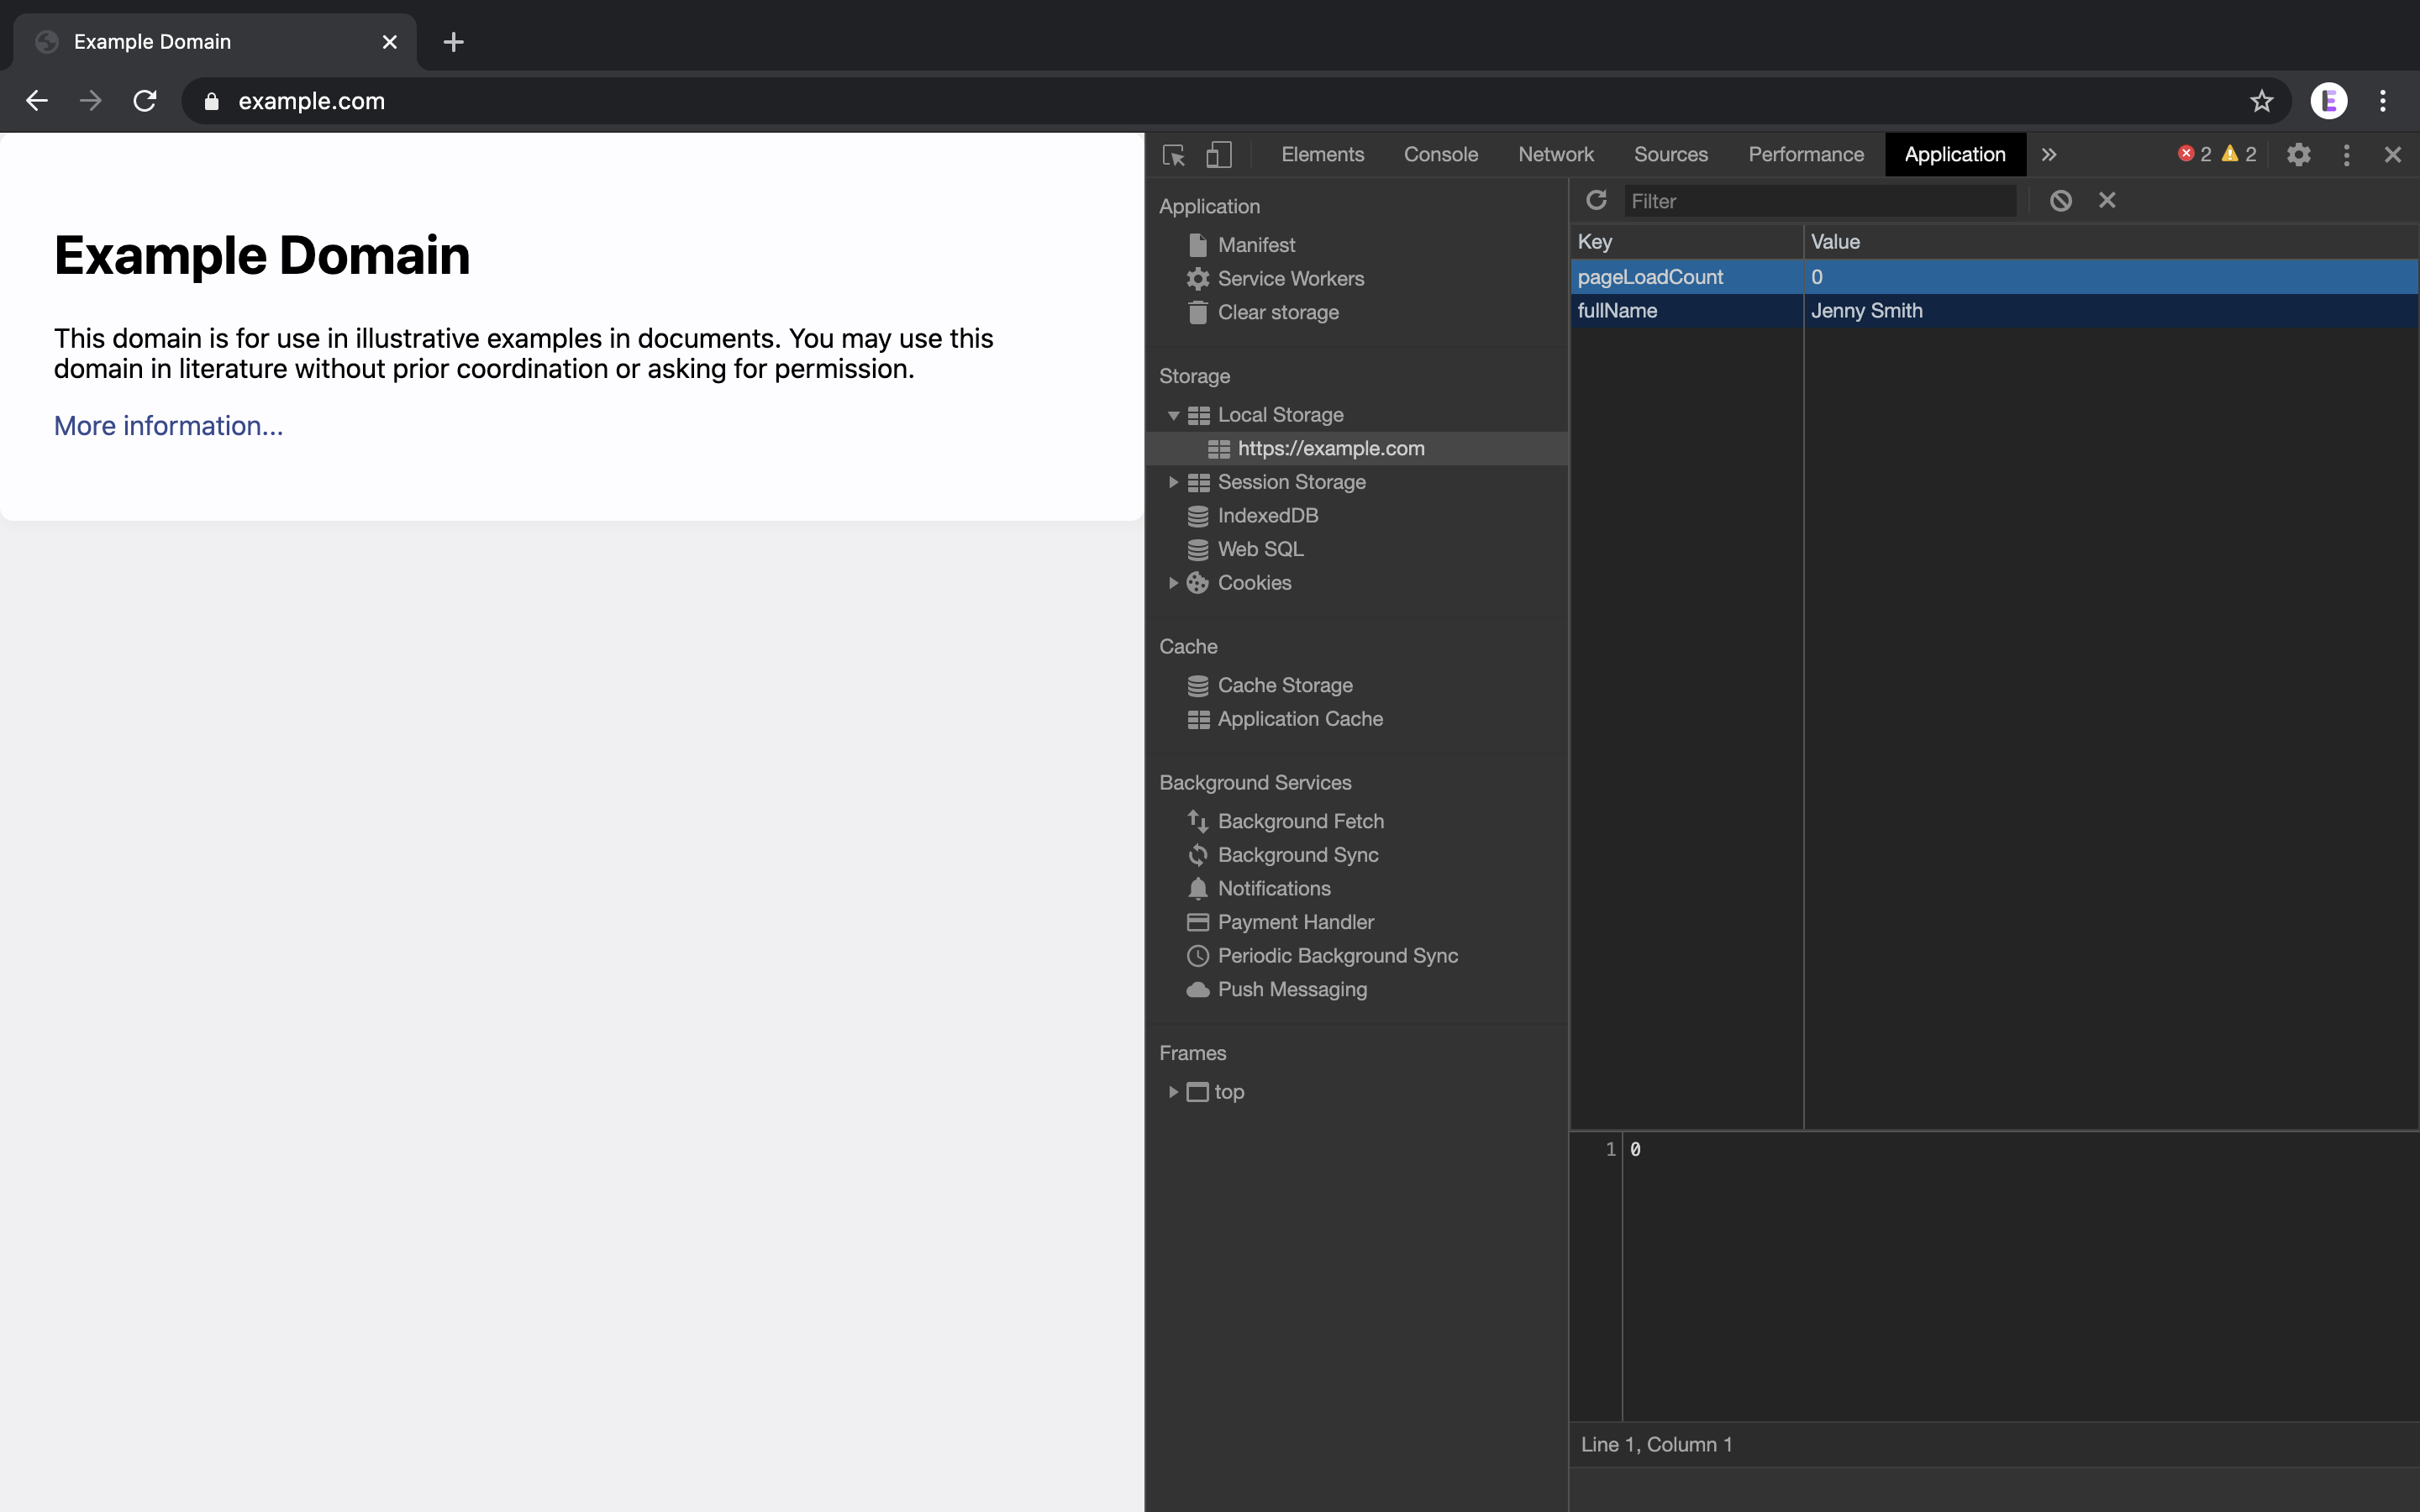
Try it out! Add the code above to your <script> and reload the page. You’ll see that our data is now in localStorage:

We can also save a number to localStorage, but it will get converted to a string before being saved. Let’s save a number called pageLoadCount to 0. See if you can work out how to do it yourself!
localStorage.setItem('pageLoadCount', 0);
You should see this data show up in our localStorage as well!
Getting data with localStorage.getItem
Every time you reload the page, you’ll see that our data stays in localStorage. Now it’s time to learn how to use it! We can retrieve it from localStorage using localStorage.getItem, along with the key that we want to retrieve. For example, here is how we can console.log the fullName value:
console.log(localStorage.getItem('fullName'));
// Outputs "Jenny Smith" to the console
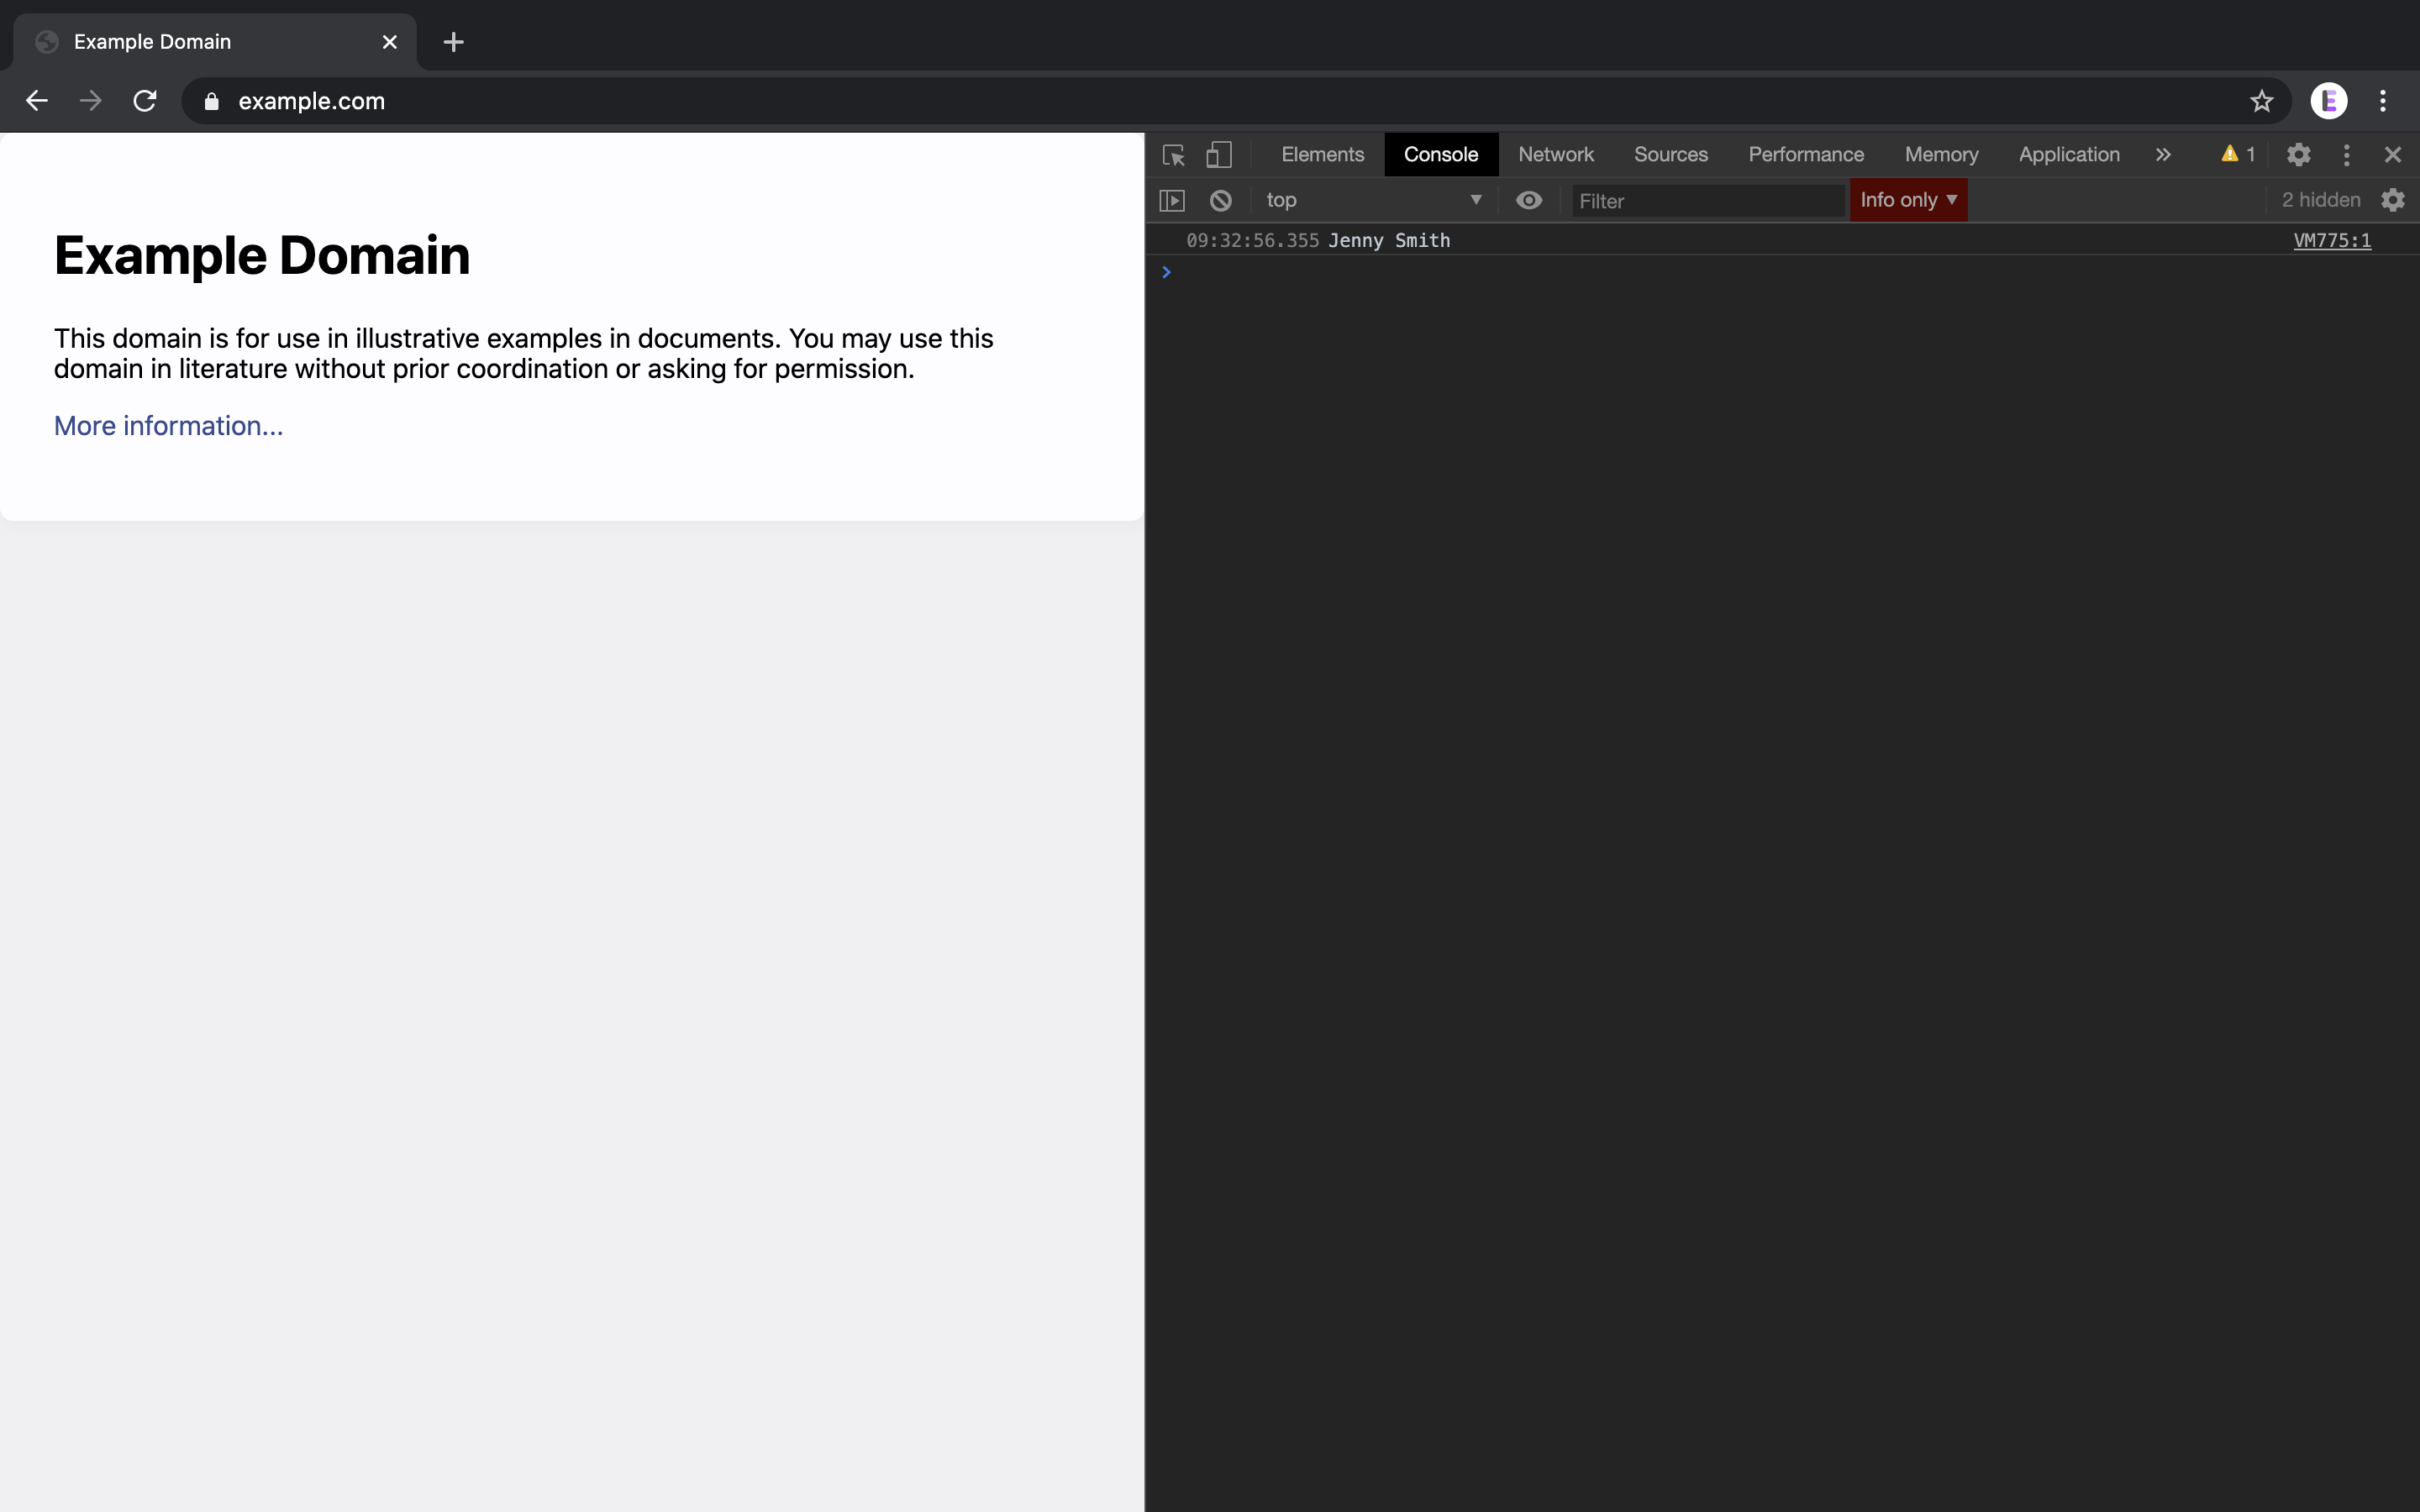
Try it out! If you go to the Console tab in the inspector, you will see that our value has been logged:
Let’s try something that combines setItem and getItem. We want to get the value of pageLoadCount, add 1 to it, then save the new value back to localStorage. See if you can work out how we’d do that…
var newPageLoadCountValue = localStorage.getItem('pageLoadCount') + 1;
localStorage.setItem('pageLoadCount', newPageLoadCountValue);
Try reloading the page a few times, then take a look at our pageLoadCount value in localStorage. In my case, I reloaded the page three times:

Oops! That’s not what we wanted! It should have had a value of 3!
Why do you think it ended up as 0111?
Well, as I mentioned earlier, all data gets converted to a string before getting saved to localStorage. This means that localStorage.getItem('pageLoadCount') is a string, not a number. So it was actually "0", rather than 0. When we add a string and a number, it adds the number on to the end of the string. So our number that we were adding, 1, got added to our string, "0". This resulted in the string "01". But that’s not what we want!
We can fix this issue by converting the value of pageLoadCount from localStorage.getItem to a number before adding 1 to it.
First though, set the pageLoadCount back to 0. We can do this directly from the inspector! Double click on where you see 0111 in the inspector, then type 0, then hit Enter.
Here’s the correct code, including the part where we convert it to a number:
var newPageLoadCountValue = Number(localStorage.getItem('pageLoadCount')) + 1;
localStorage.setItem('pageLoadCount', newPageLoadCountValue);
As you can see, we wrap localStorage.getItem('pageLoadCount') in Number(). This converts the value to a number before adding 1.
Set that as the contents of your <script> tag, reload the page a few times, and try it out! You’ll see that our pageLoadCount now goes up by 1 in localStorage every time we reload the page.
Removing data with localStorage.removeItem
If we want to remove a piece of data from localStorage, we can simply use localStorage.removeItem along with the key name, similar to how we use localStorage.getItem. Try it out:
localStorage.removeItem('fullName');
Our fullName of Jenny Smith will now be removed from localStorage.
Clearing data with localStorage.clear
If we want to remove all data from localStorage, we can do so by calling localStorage.clear without any parameters:
localStorage.clear();
This function can be very useful when you want to clear all saved data, for example when the user clicks a “log out” button.
Getting and setting objects and arrays to localStorage
We may want to save objects or arrays to localStorage. For example, let’s say we have a user object:
var user = {
  firstName: 'Jenny',
  lastName: 'Smith',
  username: 'jenny32',
  age: 45
};
Let’s try saving it to localStorage, with a key of user:
var user = {
  firstName: 'Jenny',
  lastName: 'Smith',
  username: 'jenny32',
  age: 45
};

localStorage.setItem('user', user);
Let’s see what it looks like in localStorage:
![The key "user" has the value of "[Object object]"](/assets/img/posts/javascript-localstorage/object-object.png)
Oops! That’s not what we want!
It looks like this because when you convert an object to a string using toString, it gives using a string with a value of "[Object object]". This isn’t very helpful!
We can store it properly by using the JSON.stringify function. This converts an object or array to a string, in a way where we can convert it back later. Try it out:
var user = {
  firstName: 'Jenny',
  lastName: 'Smith',
  username: 'jenny32',
  age: 45
};

var userString = JSON.stringify(user);

localStorage.setItem('user', userString);
You will see that the data is now stored properly in localStorage:
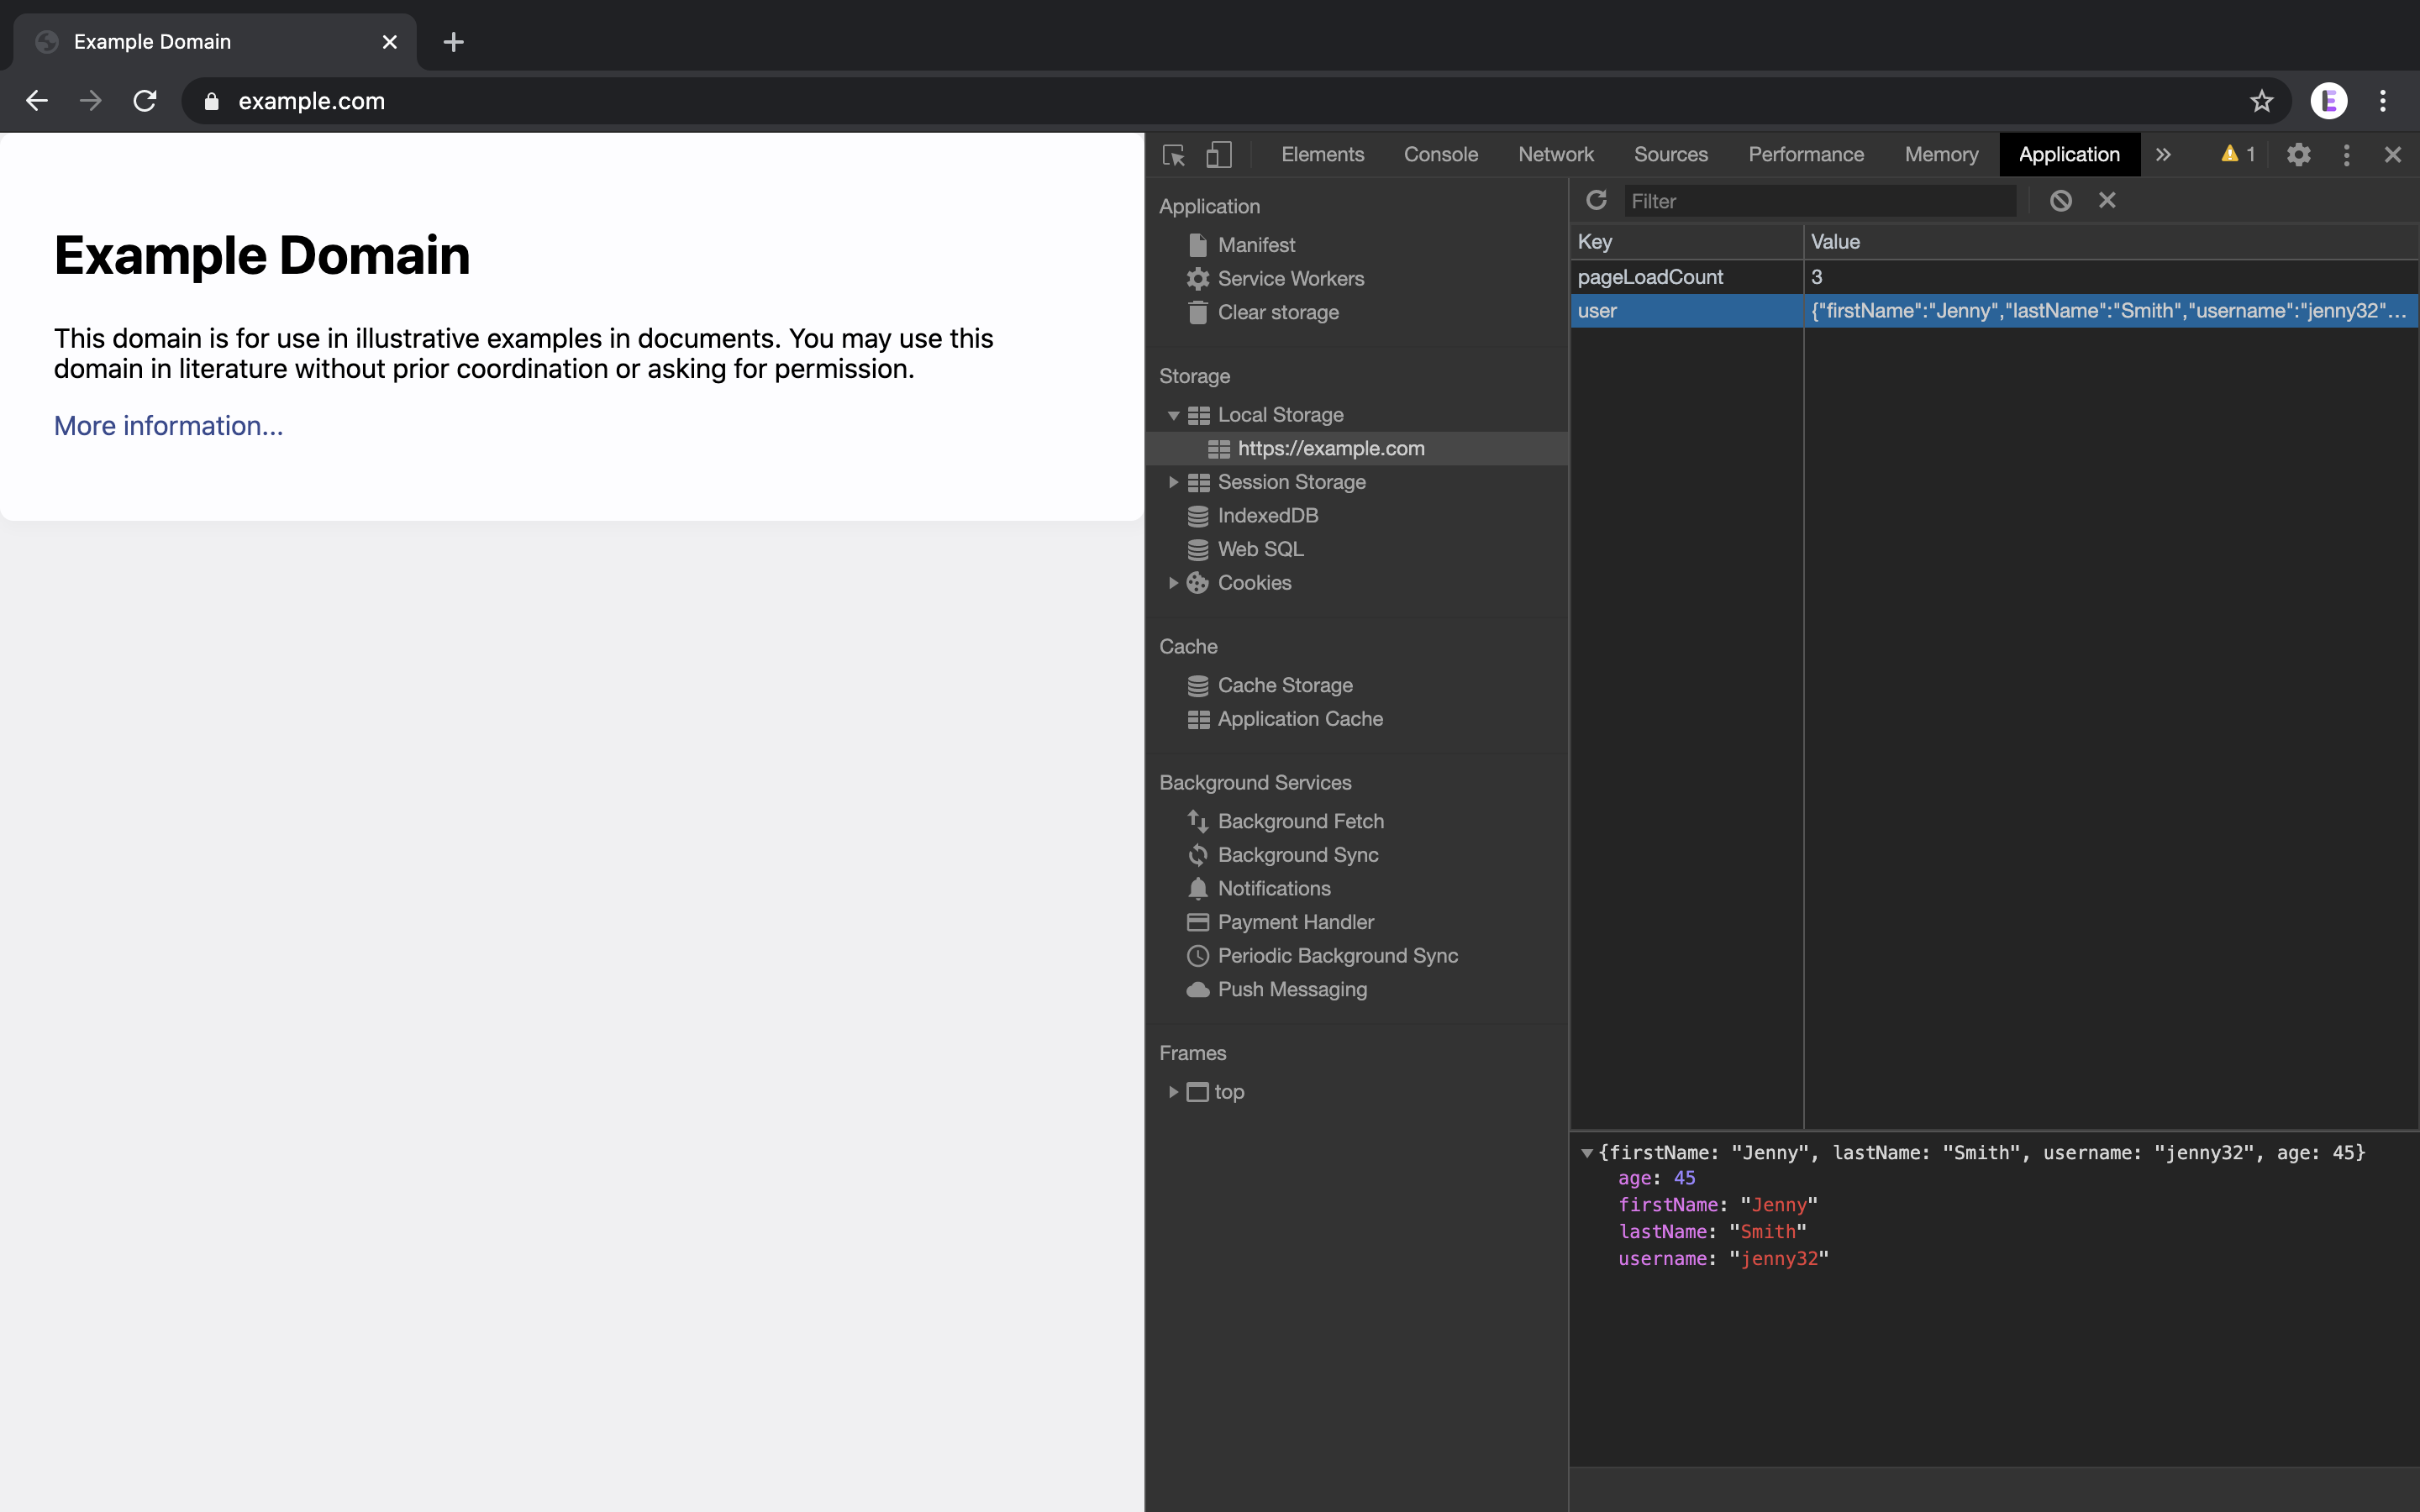
Perfect!
If we want to retrieve this object from localStorage, we need to convert it back from a string into an object. We can do this using JSON.parse:
var userStringFromLocalStorage = localStorage.getItem('user');

var userFromLocalStorage = JSON.parse(userStringFromLocalStorage);

console.log(userStringFromLocalStorage);
// Outputs the user as an object to the console
The output will look like this:
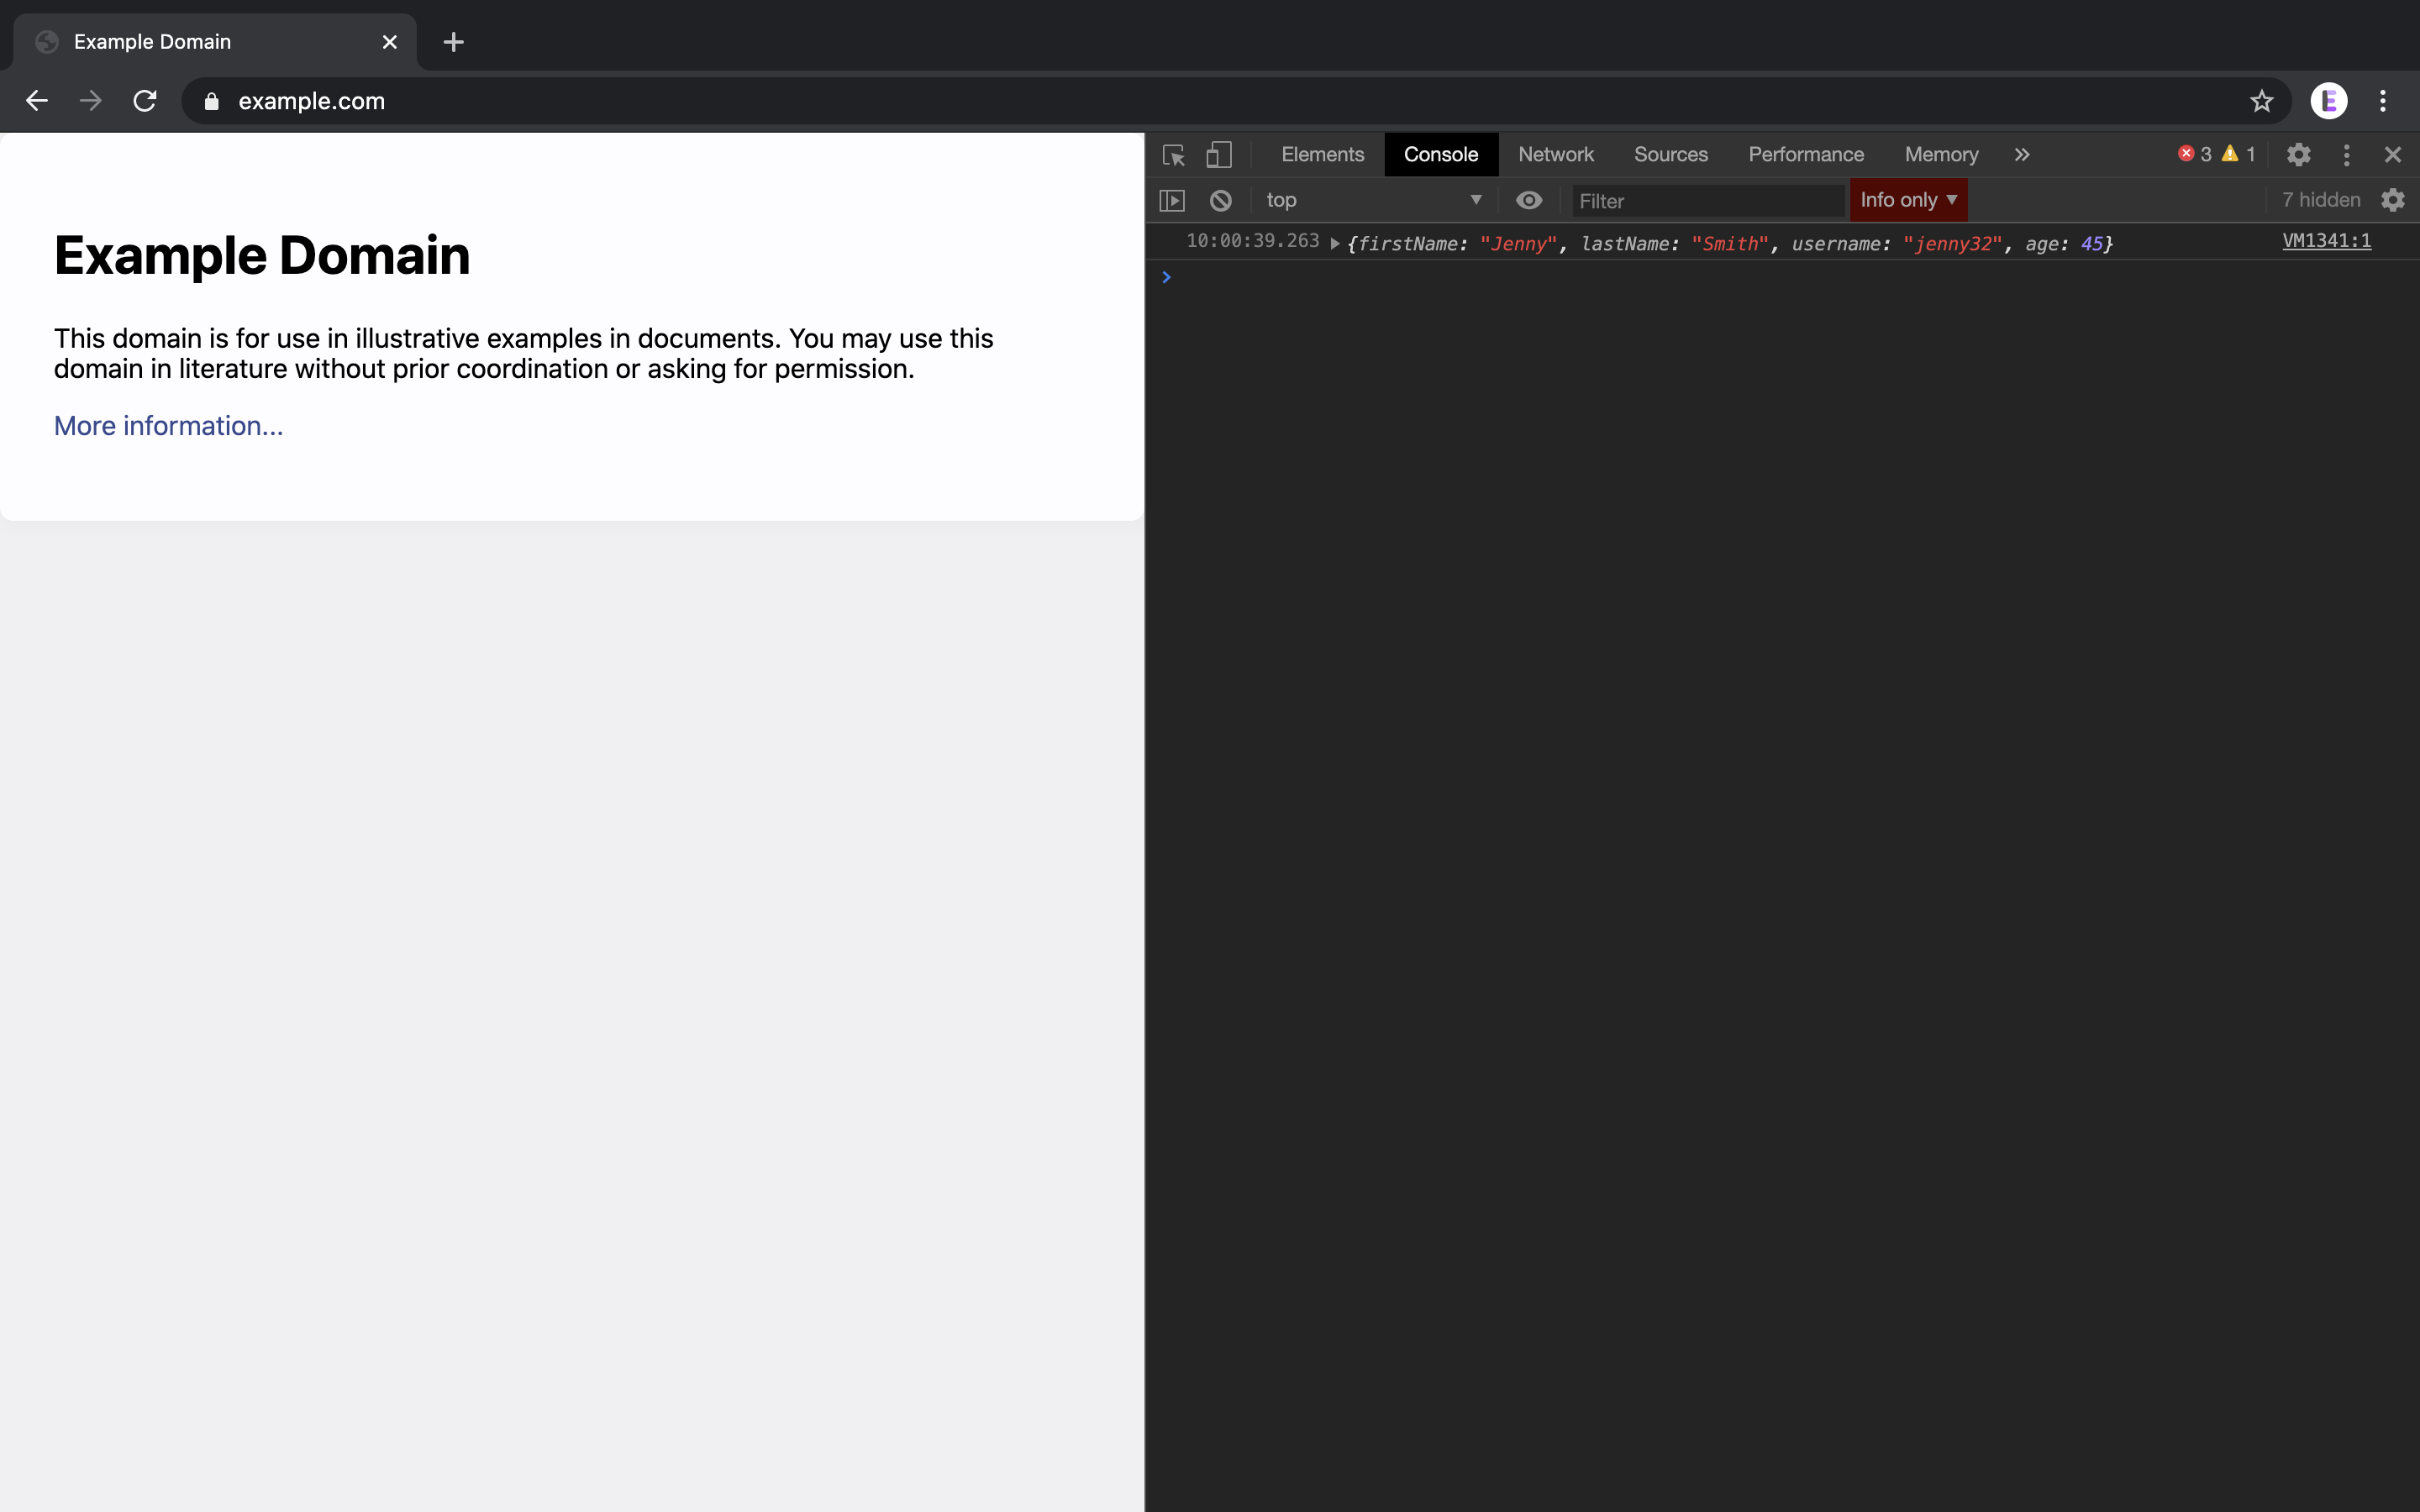
Awesome! This method would also work if user was an array, instead of an object.
Conclusion
Awesome, that’s everything for today! Congrats on getting through this tutorial, you can now save data between page loads! This can be very useful for many things including web apps and web-based games. These concepts can be confusing at first, but you’ll get the hang of it with practice.
If you think this article would be helpful to others, feel free to share it!
If you have any feedback, need help, or just wanna say hi, feel free to do so in the comments below.
If you found this article helpful, you can also buy me a coffee — it takes lots of time and effort to write these articles and maintain this site, and you get to read it all for free! I do get ad revenue from the ethical ads on this site, but it’s currently only about $10-15 per month.
And finally, don’t forget to join the newsletter to receive curated web development resources for beginners from around the internet! It’s been a bit inactive lately, but sign up to receive them when I start it more actively again.
See you next time! 😀