CSS display types tell the browser the way in which elements should be treated. Learn about the most common display types and how to use them in this article…
Getting started
I think that it is best to learn by doing, so I highly recommend following along in all my tutorials. To follow along start by making a new project folder with index.html and style.css files in it. Add the following code to your index.html:
<!DOCTYPE html>
<html>
    <head>
        <title>CSS display types DEMO</title>
        <link rel="stylesheet" href="style.css">
    </head>
    <body>
        <p>I am just some normal, innocent text.</p>
        Except here is a bit of text that is <div class="div1">different</div>, yay!
        <div class="div2">Now here's another div.</div>
        <p>And some more <span class="span1">normal</span> text.</p>
    </body>
</html>
Open your index.html file in your browser - the content should pop up! We’ll leave the style.css file blank for the moment.
The display property
There are many values that the display property can have, but there are only about five that you need:
blockinlineflexgridnone
In this article, I’ll be covering block, inline and none, which are the most common. In future articles I will be talking about flex (for flexboxes) and grid (for CSS grids), which are a bit more complicated.
Let’s get started!
display: block
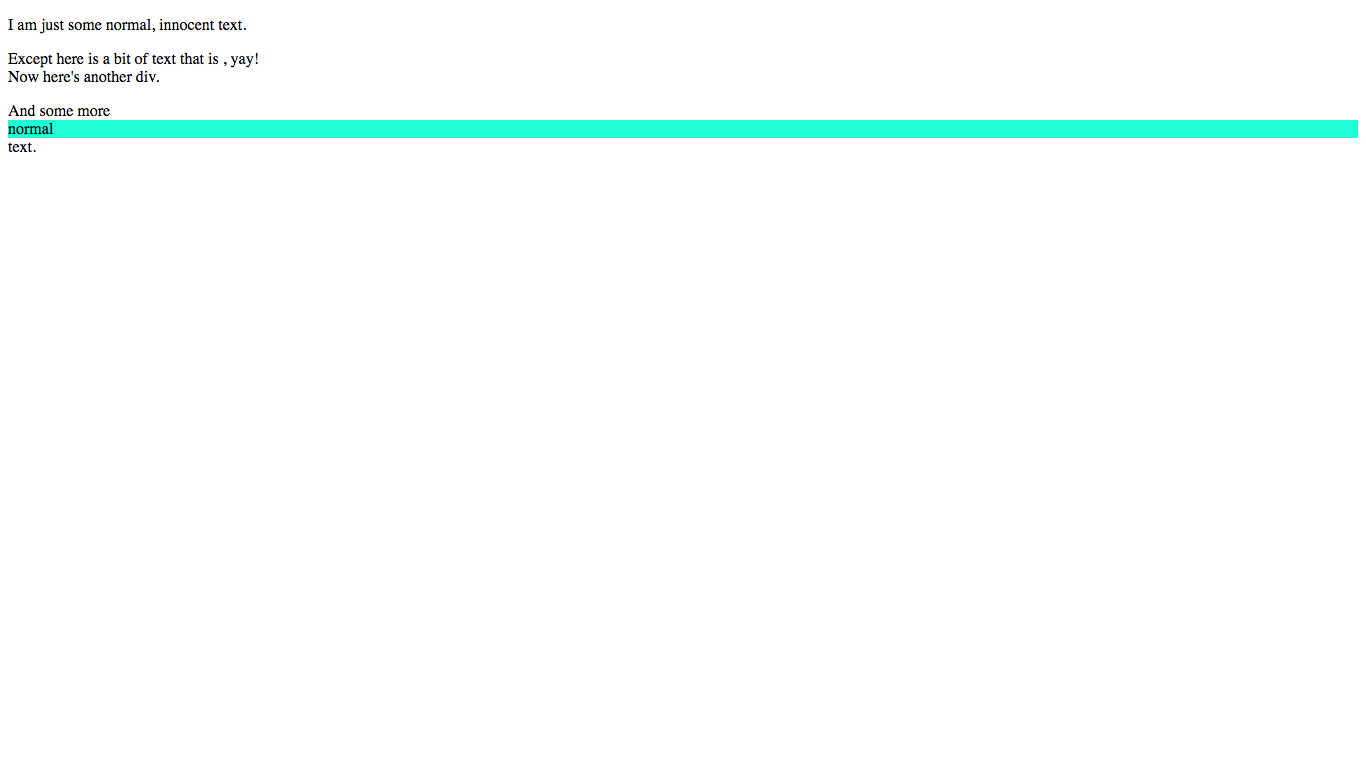
To begin with, our website looks like this:
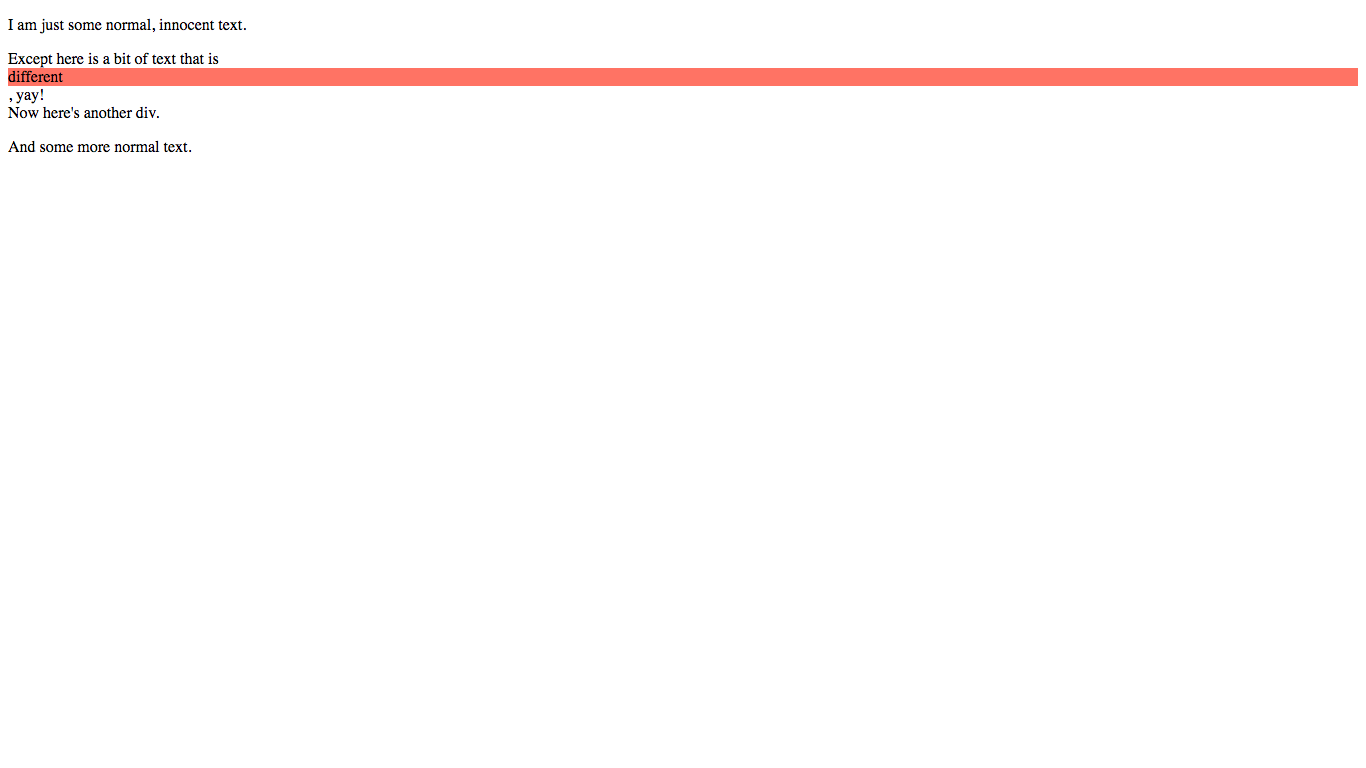
Woah, what happened here?
Except here is a bit of text that is <div class="div1">different</div>, yay!
The word different is on its own line! This is because a <div> has a default display type of block.
Elements with a display type of block are commonly called block-level elements and always start on a new line. They also take up the full width that they can (the equivalent of width: 100%). To see the block-magic in action, let’s give our <div> a background-color in the style.css file:
.div1 {
    background-color: salmon;
}
And take a look at the result:
Yay! As you can see, our <div> takes up the whole screen because of it is a block-level element.
Okay, now its time to try making our own elements block-level! Take a look at this line in our HTML:
<p>And some more <span class="span1">normal</span> text.</p>
What if we want to make the word normal on its own line, just like the word different from above? Simply set the display property to block:
.div1 {
    background-color: salmon;
}

.span1 {
    background-color: aquamarine;
    display: block;
}
Here is the result:
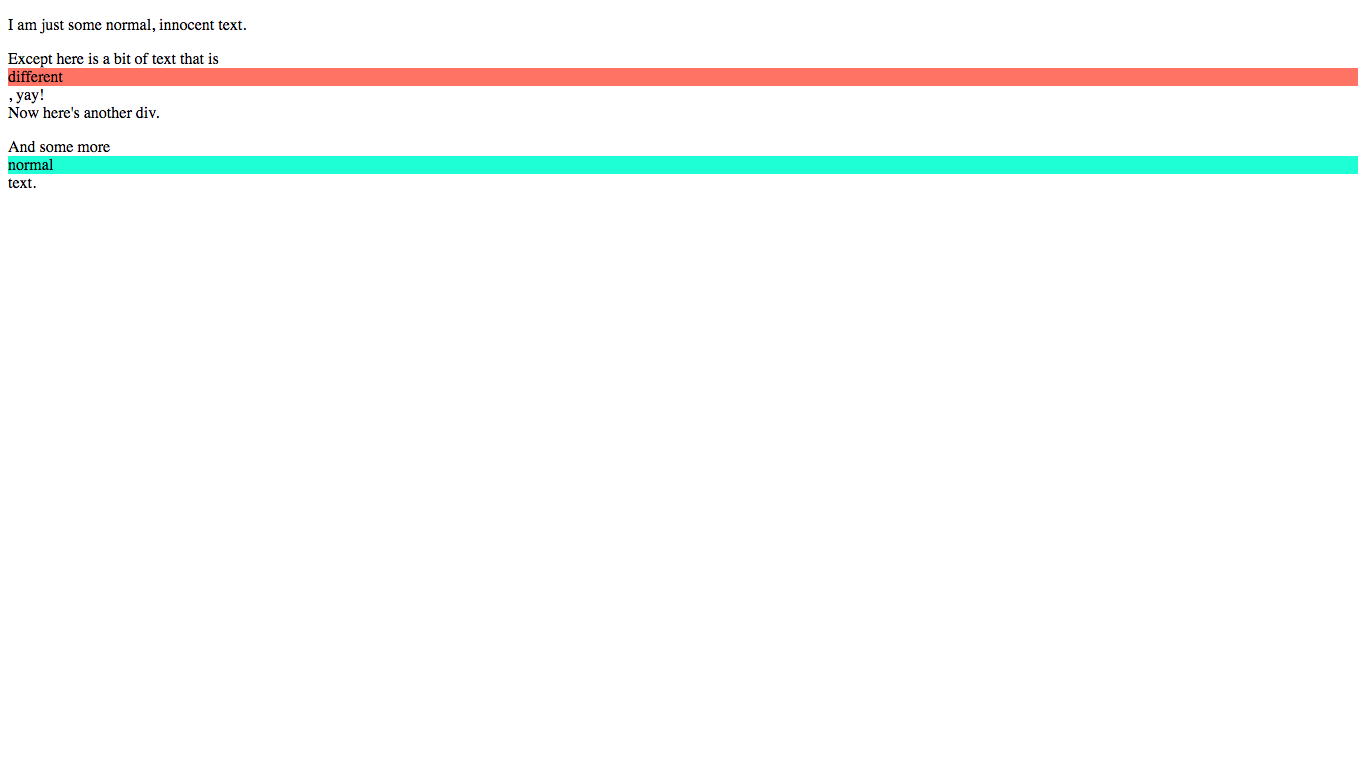
Woot! As you can see, the word normal is also displayed as a block-level element! “But why is it not displayed as block to begin with” you may ask? Well, the word normal is wrapped by a <span>, instead of a <div>. <span>s have a default display type of inline, because they are usually used to wrap text mid-sentence.
Now, let’s learn what display: inline actually does!
display: inline
Remember the word different? Well what if we want to make it part of the sentence, instead of on its own line? This is where display: inline comes into play.
The inline display type does not create a new line, and only takes up as much width as it needs (instead of the maximum).
So, let’s try it out! Give our .div1 an inline display type:
.div1 {
    background-color: salmon;
    display: inline;
}

.span1 {
    background-color: aquamarine;
    display: block;
}
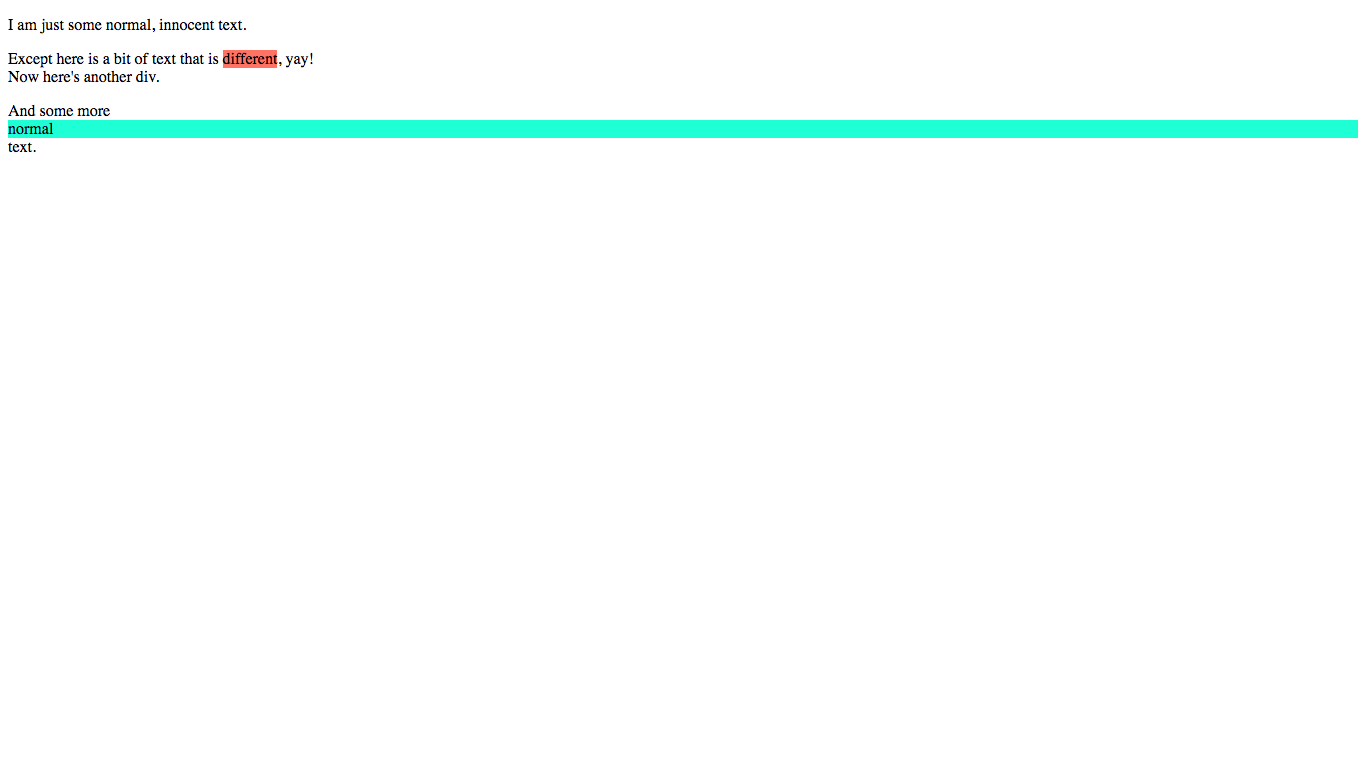
Hoorah! Now, the word different is just a normal part of the sentence, and it doesn’t take up the maximum width. This is the beauty of display: inline.
display: none
Giving an element a display type of none makes it disappear completely from the page. No space is left for it, and other elements are positioned as if it were not there. Let’s try it out on our .div1:
.div1 {
    background-color: salmon;
    display: none; /* Change this line */
}

.span1 {
    background-color: aquamarine;
    display: block;
}
Now the word different has disappeared completely! Now you can see what I meant when I said that there is no space left for the missing element - the other words are positioned as if the word different never existed.
display: none or visibility: hidden ?
visibility: hidden can also be used to hide elements. So what is the difference then?
Remember how I said above that display: none doesn’t leave space for the missing element? Well visibility: hidden does leave space for the missing element. With visibility: hidden, it’s like it is invisible but still there (you just can’t see it), whereas with display: none the element isn’t even there.
Enough explaining, let’s try it out and see for ourselves! Change the display property of .div1 back to inline, and then set the visibility property to hidden:
.div1 {
    background-color: salmon;
    display: inline;     /* Change this back to inline */
    visibility: hidden;  /* Add this line */
}

.span1 {
    background-color: aquamarine;
    display: block;
}
As you can see, the rest of the page acts as if the word is still there - it is just invisible.
Fun fact - Every element has a display type by default
Believe it or not, every element has a display type - including elements in the
<head>such as<title>and<link>, which have a display type ofnone!
Conclusion
Congrats on making it thorugh the article! You now know about the display property, and have grasped one of the main concepts of CSS.
If you liked this article, I’d really appreciate if you shared it or signed up to the newsletter to recieve new posts in your inbox.
If you are having any trouble with the concepts I’ve talked about in this article (or any, really!) then you can ask me in the comments below or contact me via email. On that note, if you have any feedback or suggestions I’d also appreciate if you left a comment - I’m always trying to improve!
HAPPY BIRTHDAY TO ME 🎉
By the way, it has been 2 months since I wrote my first article on Code The Web! During that time I have had many great experiences, conversations with the community, had > 4K users on my site and 50 awesome newsletter subscribers (just in time, as of this morning 😉)
EDIT: I wrote a bit about my first 2 months here to celebrate.
Have fun and I’ll see you next time, where I’ll be talking about some cool stuff you can do with background images.