CSS is the language used to make websites unique. To make websites look good. Start your quest to learn CSS in this article…
What is CSS?
CSS stands for Cascading Style Sheets, and is used to style HTML. Without CSS, the entire web would look like this:
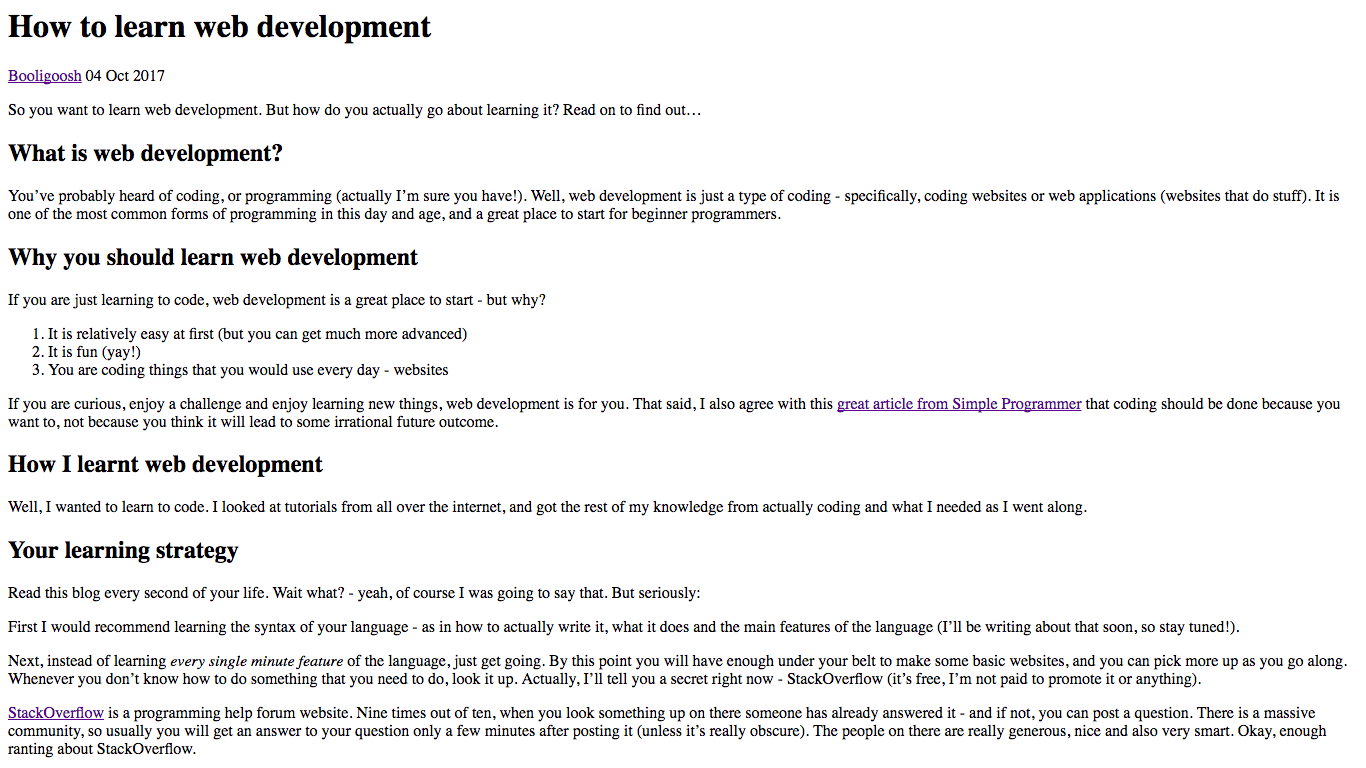
With CSS, that same article would look like this:

As you can see, CSS plays a massive role in building the websites that we use every day.
The structure of CSS
CSS is made up of selectors and declarations. Take a look at this example:
h1 {
    color: red;
    text-align: center;
}
This is known as a rule set. Here, h1 is the selector - this is because we are selecting all the <h1> elements on the page to style. Next, we state our declarations in curly brackets. So all CSS selectors look like this (including the curly brackets, these are important):
selector {

}
Next, let’s take a look at the declarations - first of all, all the declarations go within the curly brackets of the selector that they belong to - so in the example above, the declarations would be styling the <h1> elements. The declaration syntax looks like this:
property: value;
Don’t forget the colon and semicolon, these are very important and must always be included. So, now you know the structure of CSS! Here is a code snippet to consolidate:
selector {
    property: value;
    property: value;
}
There is no limit to the amount of declarations that can be put in a CSS rule set. There rule sets can also be multiple rule sets in a CSS file:
h1 {
    color: red;
    text-align: left;
}

h2 {
    color: blue;
    text-align: center;
}

h3 {
    color: green;
    text-align: right;
}
Follow along!
I forgot to mention - you can follow along! If you need help on how to run your code, check out this article. Copy this HTML into a new HTML file called index.html:
<!DOCTYPE html>
<html>
    <head>
        <title>My awesome website</title>
    </head>
    <body>
        <h1 class="my-class">Title</h1>
        <h1>Another H1</h1>
        <h2 class="another-class">Subheading</h2>
        <h4 class="two classes">Okay, this is getting crazy</h4>
        <h5 class="multiple classes">I sure have a lot of headings</h5>
        <h5 class="i-have-a-different-class">This is another H5</h5>
        <h6 id="my-id">Wow, this one is so small that it barely looks like a heading</h6>

        <p>Content, content content. Yay I like content.</p>
        <p>This is a new paragraph, you will notice the line break above. This second paragraph here even has... Multiple sentences!</p>
        <p>Wow, it's really hard to think of dummy content for three paragraphs. So here's some latin dummy text: Curabitur aliquet varius odio et volutpat. <span id="make-me-green">Aenean</span> sagittis quam vitae eros ultrices tempor. Fusce et dolor vel lorem lobortis rhoncus non et ex. Nulla at ex suscipit, mollis neque a, egestas arcu. Praesent porttitor aliquet leo, ac elementum lorem ullamcorper nec. Integer ut sollicitudin est. Ut et erat ornare, ultricies risus ut, iaculis purus. Duis vulputate lorem eu augue ullamcorper porta. Aliquam a placerat nunc, id rutrum orci.</p>

        <ul class="my-ul">
            <li id="my-li">Hello, <span>how are you?</span> I am great...</li>
            <li>Another list item...</li>
        </ul>
    </body>
</html>
Next, create a CSS file in the same folder called style.css. Add the following code:
h1 {
    color: red;
}
Open up your HTML file now - it should look normal, and the <h1>’s will not be red. This is because we need to include our CSS file in our HTML. We do this by adding a link to our head:
<head>
    <title>My awesome website</title>
    <link rel="stylesheet" href="style.css">
</head>
Now, when your reload your page, the <h1>’s should appear red!
Now you’re ready to follow along through the rest of this article (and any of my CSS tutorials, in fact!).
CSS selectors
As I mentioned earlier, CSS selectors are used to tell the browser which element you want to style:
h1 {
    color: red;
}
In this example, you are telling the browser that you want to style all <h1>s with the styles inside the curly brackets. However, there are some other CSS selectors as well. Let’s go into the different types of CSS selectors and what they do:
Element selectors
This is like the h1 example you saw above. Simply type the tag name of the element, and it will select all of those elements (eg. all <h1>s)
Class selectors
This selects elements with a certain class attribute. For example, in the HTML that you copied:
<h2 class="another-class">Subheading</h2>
The CSS syntax to select all elements with the another-class class would be:
.another-class {
    color: blue;
}
Try adding this to your CSS file, and you should see the <h2> turn blue. An element can have multiple classes, separated by spaces:
<h4 class="two classes">Okay, this is getting crazy</h4>
<h5 class="multiple classes">I sure have a lot of headings</h5>
Here, the <h4> has the classes of two and classes, while the <h5> has the classes of multiple and classes. So, if you wanted to style both of these, you could use the classes class, as they both have it:
.classes {
    color: gold;
}
Add this to your CSS file - you will see the <h4> and <h5> turn gold.
ID selectors
As well as having classes, elements can also have IDs:
<h6 id="my-id">Wow, this one is so small that it barely looks like a heading</h6>
Note that they can have both classes and IDs (bonus, right?)
<h6 class="i-also-have-a-class" id="my-id">Wow, this one is so small that it barely looks like a heading</h6>
An ID is unique - no two elements should have the same ID. Unfortunately, an element may only have one ID ( 😞 ) Here is how you select and element with an ID of my-id in CSS:
#my-id {
    color: magenta;
}
Add this to your CSS file, and you will see your <h6> turn magenta…
That’s it for the types of selectors I’ll cover today! Down the track I’ll be making a post with some super-fancy awesome advanced CSS selectors. In the meantime, you can look at this awesome reference on FreeCodeCamp if you want to learn some more selectors.
But wait! We’re not done yet! We still have to cover one of the most important parts of CSS selectors…
Combining CSS selectors
There are multiple ways to combine CSS selectors:
1. Selecting something inside something else
Here is an example from the HTML I asked you to copy near the beginning:
<ul class="my-ul">
    <li id="my-li">Hello, <span>how are you?</span> I am great...</li>
    <li>Another list item...</li>
</ul>
Let’s say that we wanted to make the “how are you?” orange. How would you describe this to someone, without just saying the bit that says “how are you?”
What you would do is you would say the <span> inside the <li>. Or the <span> inside the <ul>. Or the <span> inside the <li> inside the <ul>.
To specify a selector inside another selector, we simply state them after each other with spaces in between:
ul span {
    color: orange;
}
The example above is saying “Any <span>s inside <ul>s. There is no limit as to the number of selectors you can nest:
ul li span {
    color: orange;
}
Here, the CSS is saying “Any <span>s inside <li>s inside <ul>s. You don’t have to just use element selectors, you can use any of the selectors that you have learned:
.my-ul #my-li span {
    color: orange;
}
Here, we are saying “Any <span>s inside the element with the ID of my-id inside any elements with a class of my-ul. As you can see, there can often be many ways to say the same thing in CSS. Try adding any of these code snippets to your CSS file and see what happens…
2. Selecting one element(s) using multiple selectors
Woah, what? Yeah, I spent a long time on #1, but in case you have forgotten I am still talking about ways to combine CSS selectors. The reason that you would want to do this option is to make your selection more specific. For example, take a look at this code from our HTML:
<h4 class="two classes">Okay, this is getting crazy</h4>
<h5 class="multiple classes">I sure have a lot of headings</h5>
<h5 class="i-have-a-different-class">This is another H5</h5>
Let’s say that I wanted to select only the middle <h5>. How would you do this? You can’t say .classes, as that will also select the <h4>. You can’t say simply h5, as thay will also select the second <h5>. So we need to be more specific. We want to say, “Select the <h5> element with a class of classes.” Here’s how you would do this:
h5.classes {
    color: pink;
}
Basically, put all your selectors next to each other without a space (obviously you can’t do .classesh5, as then it will think that h5 is part of the class name). Try copying the above example into your CSS file and see what happens…
You can use as many classes as you want, as well as an ID:
h5.classes.multiple#my-id.this-is-getting-really-crazy {
    color: blue;
}
Don’t add this to your CSS file though, I made up some of those classes and IDs…
CSS comments
This is the final thing I will teach you about today. Comments are used to make your code more readable and tell other people (or yourself) what is going on. The syntax for a CSS comment is like so:
/* Here is a comment */
/* This code makes all H1's red */
h1 {
    color: /* comments can appear anywhere */red; /* and at the end of lines */
    /* Comments
       can
       also
       span
       multiple
       lines. */
}
/* Another
   multi-line
   commment
*/
As you can see, a basic comment is created using the /* comment text */ syntax. It is very important to include both the opening /* and the closing */. If you want, you can try adding some comments to your CSS file.
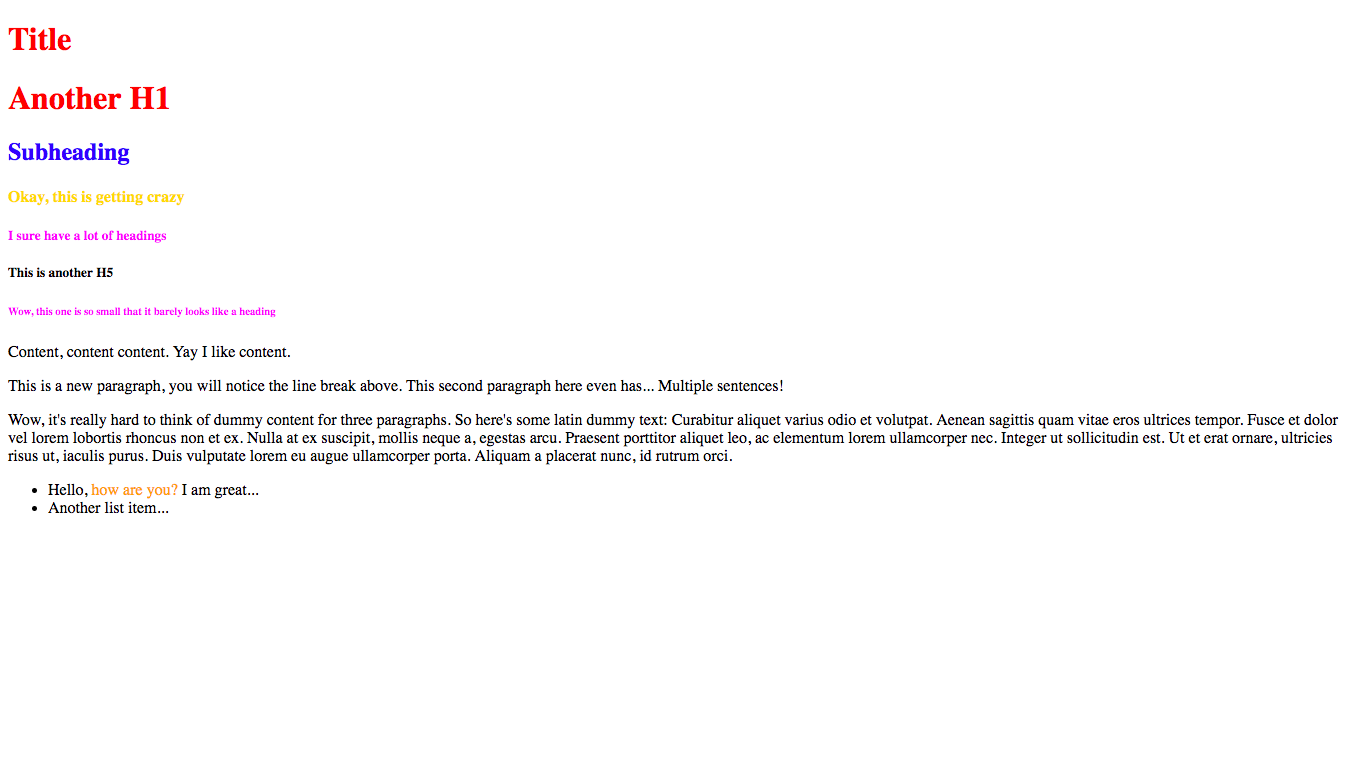
There we go! That is everything that you have to learn for today! Let’s do a final summary and see what your code and web-page should look like:
Final result
Your CSS file should look something like this (excluding comments):
h1 {
    color: red;
}
.another-class {
    color: blue;
}
.classes {
    color: gold;
}
#my-id {
    color: magenta;
}
.my-ul #my-li span {
    color: orange;
}
h5.classes {
    color: pink;
}
And your final web-page should look something like this:
Conclusion
So, I hope you learned a lot today and I congratulate you on your journey of learning CSS! If you ever need help, feel free to contact me and I will respond to you personally (unless my website ends up on the frontpage of Reddit 😜). You can also ask for help, chat and give feedback in the comments below. If you liked this you can also share it with your friends or subsribe to my newsletter to get new posts.. This way, when I make my next CSS tutorials you can get notified so you can stay motivated on your learning path. As I write my CSS tutorials, I will be posting them on the learn CSS page so that you can follow along.
Have fun and I’ll see you next time, where I’ll be talking about some basic CSS properties such as background-color, background-image, font-size and text-align. See you then!